Contents
- 1 How to Build a Powerful Events Website with StellarSites – Step-by-Step Guide
- 2 TLDR: Your Quick-Start Guide to Building an Events Website with StellarSites
- 2.1 Introduction: Your Stage is Waiting—Let’s Build It
- 2.2 Step 1: Accessing Your Digital Venue
- 2.3 Step 2: The Express Lane to Launch: Using Site Assist
- 2.4 Step 3: The Heart of Your Operation: Introducing The Events Calendar
- 2.5 Step 4: Curating Your Calendar: Creating Your First Event
- 2.6 Step 5: Choosing Your Event Toolkit: Understanding Your StellarSites Plan
- 2.7 Step 6: Selling Out: How to Sell Tickets Directly on Your Site
- 2.8 Step 7: Design with Impact: Using Event Templates and Kadence Blocks
- 2.9 Step 8: Enhanced Discovery: Making Events Easy to Find with Filter Bar
- 2.10 Step 9: Automated Promotion: Integrating with Promoter
- 2.11 Step 10: Advanced Features: Managing Complex Events
- 2.12 Conclusion: The Stage is Set—It’s Your Curtain Call
- 2.13 FAQ: Getting Started with Events on StellarSites
- 2.14 🔚 Final Thoughts & Affiliate Disclosure
- 2.15 🎁 Your Exclusive Bonus with StellarSites
How to Build a Powerful Events Website with StellarSites – Step-by-Step Guide
TLDR: Your Quick-Start Guide to Building an Events Website with StellarSites
This guide provides a streamlined process to launch a professional events website using StellarSites and The Events Calendar suite.
Here’s your action plan:
- Log In: Access your WordPress dashboard (
yoursite.com/wp-admin). - Use Site Assist: Let the AI-powered tool automatically configure your site’s design, pages, and install The Events Calendar plugin in minutes.
- Create Your First Event: Use the intuitive Events > Add New screen to list your event details, date, time, and location.
- Choose Your Plan: Unlock powerful features based on your needs:
- Essentials: Sell tickets and host virtual events.
- Plus: Add credit card payments (no fees) and a filter bar for easy discovery.
- Ultimate: Get email marketing (Promoter), community submissions, and priority support.
- Sell Tickets: Add ticket types and capacities directly to your event pages using the Tickets meta box.
- Design & Promote: Use Kadence Blocks to create stunning event descriptions and leverage tools like Promoter for automated email marketing.
- Launch: Go live and start managing your events from one central dashboard.
No technical expertise is needed. Start with a plan that matches your goals and upgrade as your events grow in size and complexity
✨ Create Your Stunning Events Calendar in Minutes
Introduction: Your Stage is Waiting—Let’s Build It
In a world craving connection, events have never been more critical. Whether you’re hosting professional conferences, vibrant community workshops, exclusive webinars, or captivating concerts, your online presence is the main stage where your audience’s journey begins. A clunky, confusing events website can turn people away before they even see what you have to offer.
But what if you could build a beautiful, professional, and incredibly functional events website without needing a degree in computer science or an endless budget?
Enter StellarSites. Paired with the industry-leading Events Calendar suite of plugins, it provides a complete toolkit to not just list your events, but to manage, ticket, promote, and sell them with breathtaking efficiency.
This guide is your all-access pass. We’ll walk you through every single step, from logging into your new site to leveraging advanced features like assigned seating and automated marketing. Let’s build an events website that draws a crowd.
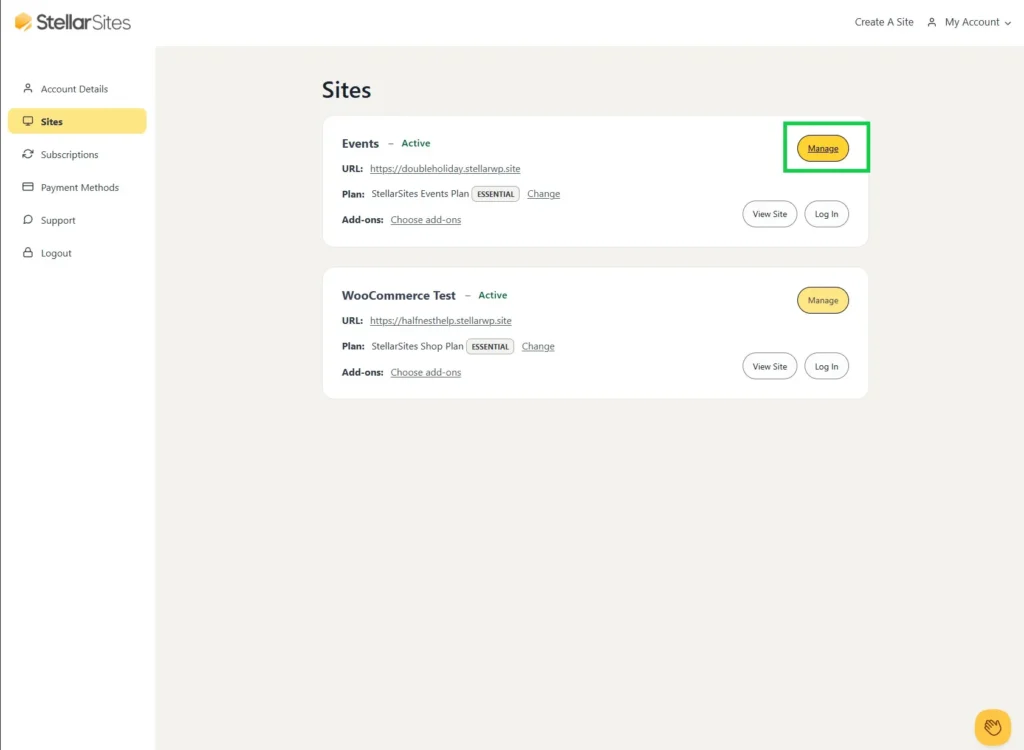
Step 1: Accessing Your Digital Venue
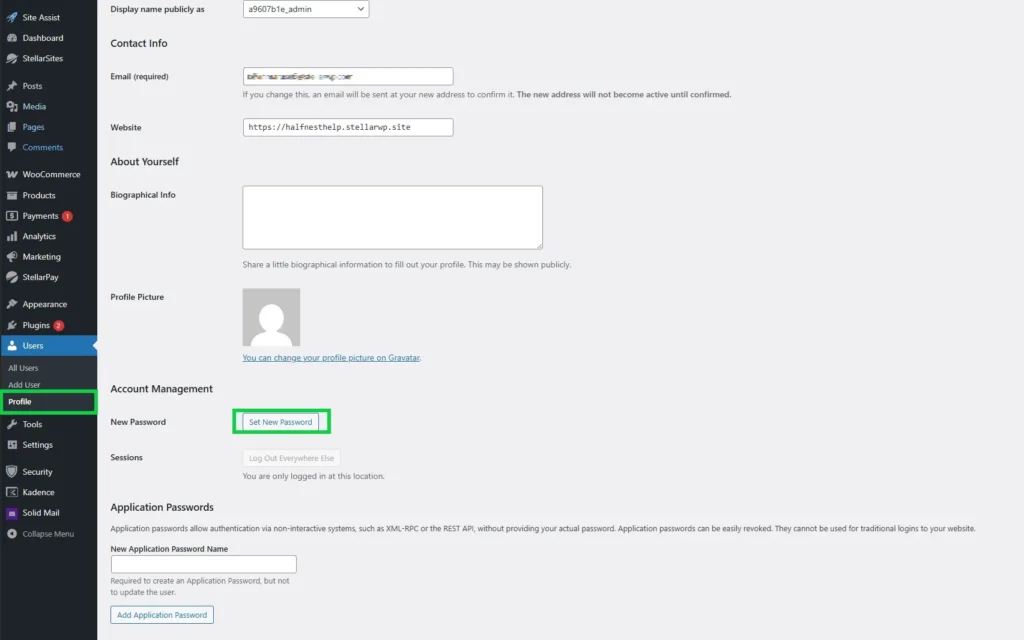
First Access: Entering Your Website’s Command Center
Every great production starts backstage. For your events website, the stage manager is your WordPress dashboard.
- Navigate to your website’s login URL. This is typically
yourwebsite.com/wp-adminoryourwebsite.com/wp-login.php. - Enter the username and password you created during your StellarSites and hosting signup process.
- Welcome to your dashboard. This is mission control. The menu on the left is your navigation to every tool and feature you’ll need to build your online venue. Take a moment to familiarize yourself with the layout.
Step 2: The Express Lane to Launch: Using Site Assist
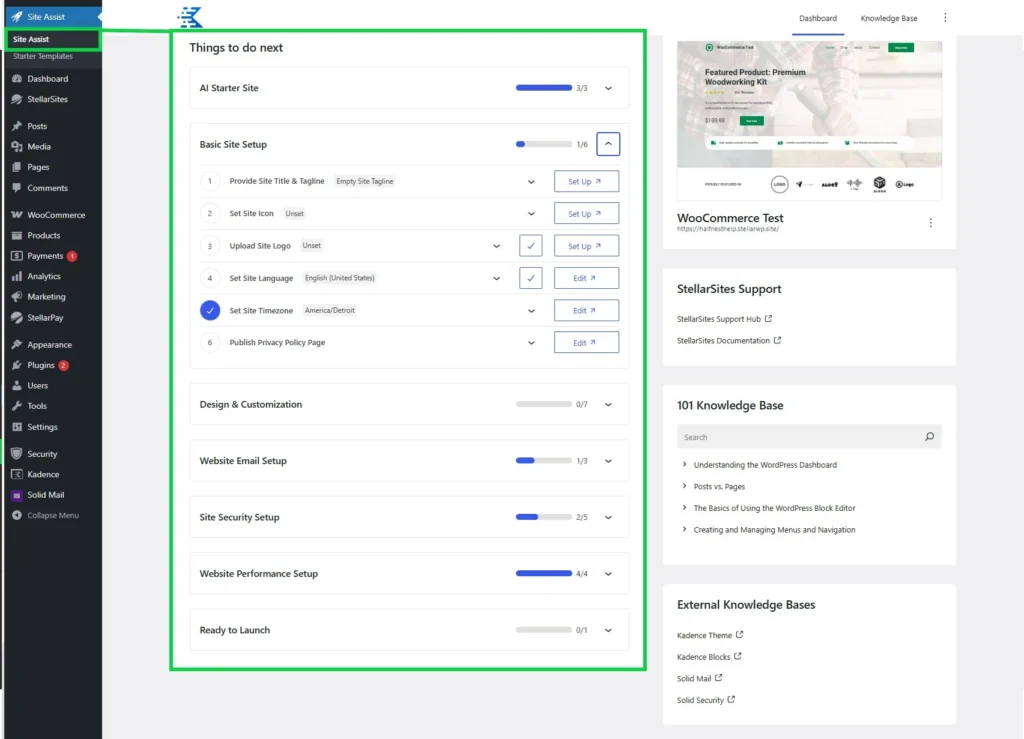
Instant Setup: How AI-Powered Site Assist Builds Your Foundation
Configuring a website from scratch can take days. Site Assist, a revolutionary feature from StellarSites, compresses this timeline into minutes using intelligent automation.
- In your dashboard, locate the Site Assist notification or find it in the admin menu.
- Launch the wizard. You’ll be asked a few simple questions about your site:
- What’s your website’s purpose? (Select “Events” or “Business”).
- What’s your preferred design style? (Modern, Classic, Warm, etc.)
- Which pages do you need? (Home, About, Events, Blog, Contact).
- Click Generate. Watch as Site Assist works its magic, automatically:
- Installing and activating The Events Calendar plugin.
- Applying a beautifully pre-designed theme (like Kadence) tailored to your style.
- Creating essential pages, including a dedicated Events page.
- Configuring fundamental settings to give you a massive head start.
This isn’t just a time-saver; it’s a strategic tool that lets you focus on curating events, not on technical setup.
Step 3: The Heart of Your Operation: Introducing The Events Calendar
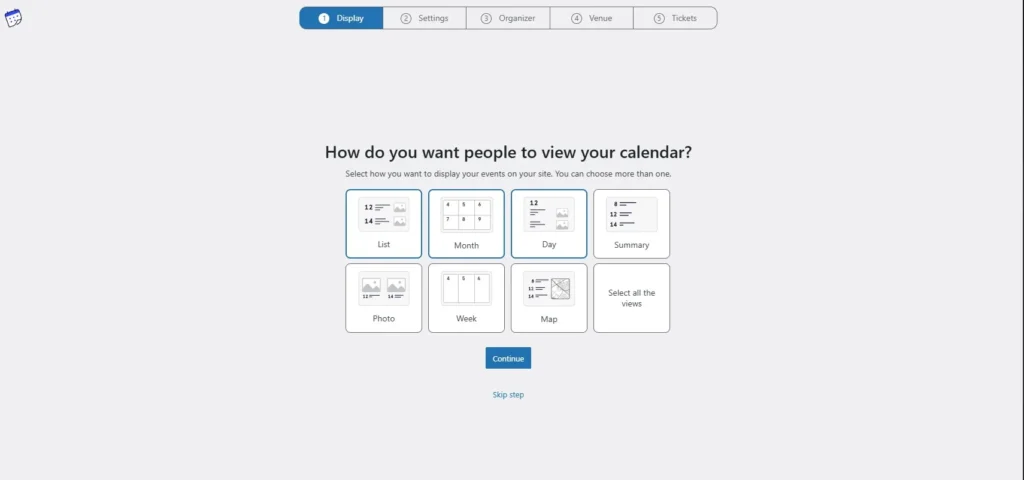
Meet Your Event Manager: The Power of The Events Calendar
If your website is the venue, The Events Calendar is the event manager, box office, and marketing coordinator all rolled into one. This powerful free plugin transforms your standard WordPress site into a fully-featured events platform.
Its core functionality allows you to:
- Create and manage unlimited events.
- Display events in multiple views: Month, Week, Day, List, and Map.
- Organize events by categories and tags.
- Feature events with rich descriptions, images, and videos.
Site Assist will have installed it for you. If you need to do it manually, go to Plugins > Add New, search for “The Events Calendar,” and click Install Now and Activate. You’ll see a new “Events” menu in your dashboard—your new headquarters.
Step 4: Curating Your Calendar: Creating Your First Event

Your Premier Event: A Step-by-Step Guide to Listing Creation
It’s time to fill your calendar. Adding your first event is a simple but crucial process.
- Navigate to Events > Add New.
- Craft a Compelling Title: Make it clear and engaging (e.g., “Sunset Yoga in the Park” vs. “Yoga Event”).
- Write a Rich Description: Use the WordPress editor to detail everything attendees need to know. What can they expect? Who is the host? What should they bring? Use Kadence Blocks to add images, galleries, and FAQs directly in the description.
- Set Date & Time: This is the most important detail. Use the intuitive date/time pickers to set the start and end of your event.
- Specify a Location: Add a physical venue address or a URL for online events. The plugin can often generate a map for physical locations.
- Organize with Categories: Assign categories like “Workshop,” “Conference,” or “Networking” to help visitors filter and find what they’re interested in.
- Set a Featured Image: Upload a high-quality, engaging image that represents your event. This is the first thing people will see.
- Publish: Hit the Publish button when you’re ready for the world to see it. Your event will automatically appear on your main events page.
Step 5: Choosing Your Event Toolkit: Understanding Your StellarSites Plan
Your StellarSites plan unlocks premium event management superpowers. The right plan depends on the complexity and scale of your events.
The Essentials Plan: Perfect for Getting Started
- The Events Calendar (Premium): Unlocks additional views and advanced features beyond the free version.
- Event Tickets: Allows you to sell tickets directly on your website and manage attendees.
- Virtual Events: Seamlessly add links for Zoom, Webex, and other video conferencing tools, making online events a breeze.
The Plus Plan: For Professional Event Producers
- Everything in Essentials, plus:
- Tickets Commerce: A powerful, fee-free gateway to accept credit card payments directly on your site (powered by Stripe).
- Filter Bar: Allows visitors to filter your events by category, price, date, and more, drastically improving user experience.
- Event Automator: Connect your events to thousands of apps like Mailchimp and Salesforce to automate tasks.
The Ultimate Plan: For Enterprise-Grade Events
- Everything in Plus, plus:
- Promoter: Send targeted email announcements and reminders to your audience directly from your dashboard.
- Community Events: Allow users to submit events to your calendar, perfect for community boards or large associations.
- Priority Support: Get your most pressing questions answered first.
Step 6: Selling Out: How to Sell Tickets Directly on Your Site
Monetizing your events is straightforward with the Event Tickets and Tickets Commerce add-ons.
- When creating or editing an event, scroll to the Tickets box below the editor.
- Click Add Ticket.
- Configure Your Ticket:
- Name: (e.g., “General Admission,” “VIP Pass”).
- Description: What does this ticket tier include?
- Price: Set the cost. Leave blank for free events.
- Capacity: Set the total number of tickets available for this tier.
- Set Up Commerce: If you have the Plus plan or higher, ensure Tickets Commerce is enabled in Events > Settings > Payments. This will allow you to accept credit cards without third-party fees (Stripe processing fees still apply).
- Save your ticket. It will now appear on your event page, complete with an RSVP or purchase form.
Step 7: Design with Impact: Using Event Templates and Kadence Blocks
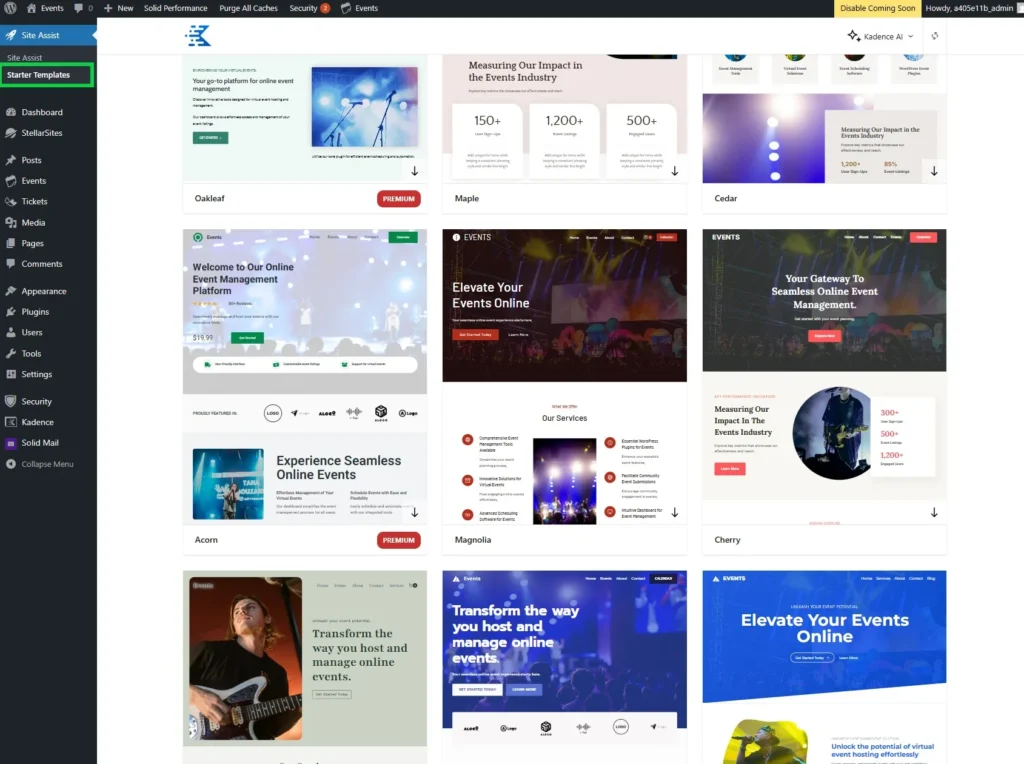
Designing the Experience: Creating Stunning Event Pages with Templates and Blocks
A boring event page won’t sell tickets. The Kadence theme and blocks plugin give you unparalleled design control.
- Event Templates: The Events Calendar offers templates for how your single event pages and calendar views look. These can be customized to match your brand.
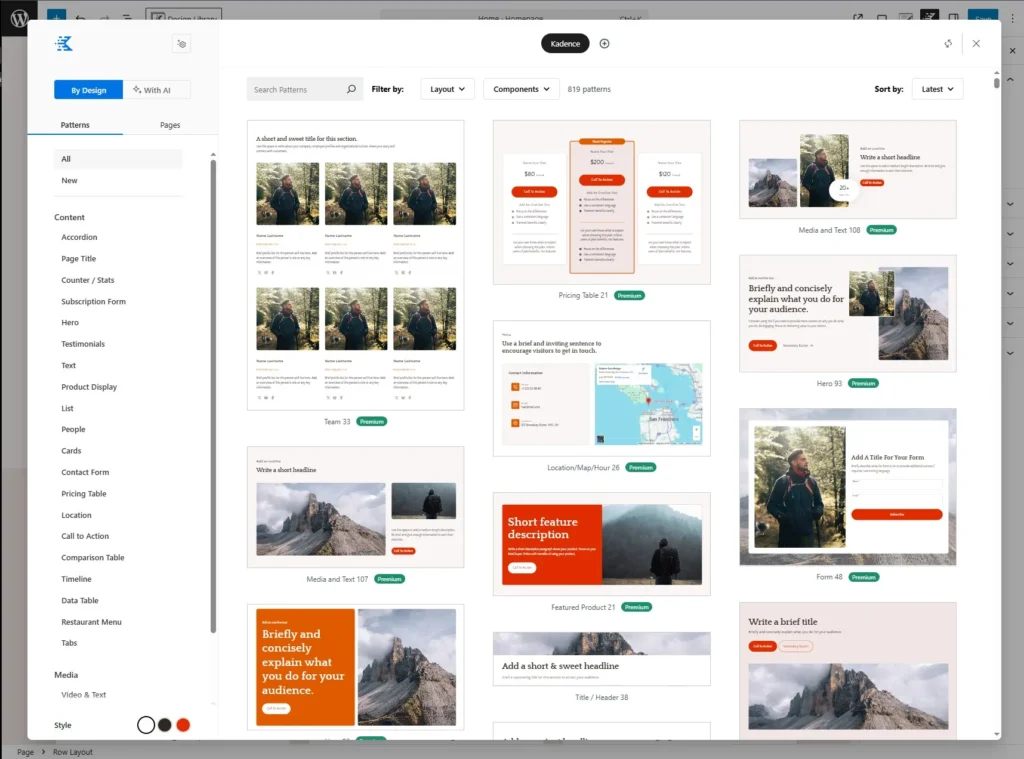
- Kadence Blocks: When writing your event description, go beyond basic text. Use Kadence Blocks to:
- Create a hero section with a full-width image and a bold “Buy Tickets” button.
- Insert image galleries of the venue or past events.
- Add tab blocks to organize information (Agenda, Speakers, FAQs) neatly.
- Place a countdown timer block to create urgency.
- Use testimonial blocks to show social proof from previous attendees.
Step 8: Enhanced Discovery: Making Events Easy to Find with Filter Bar
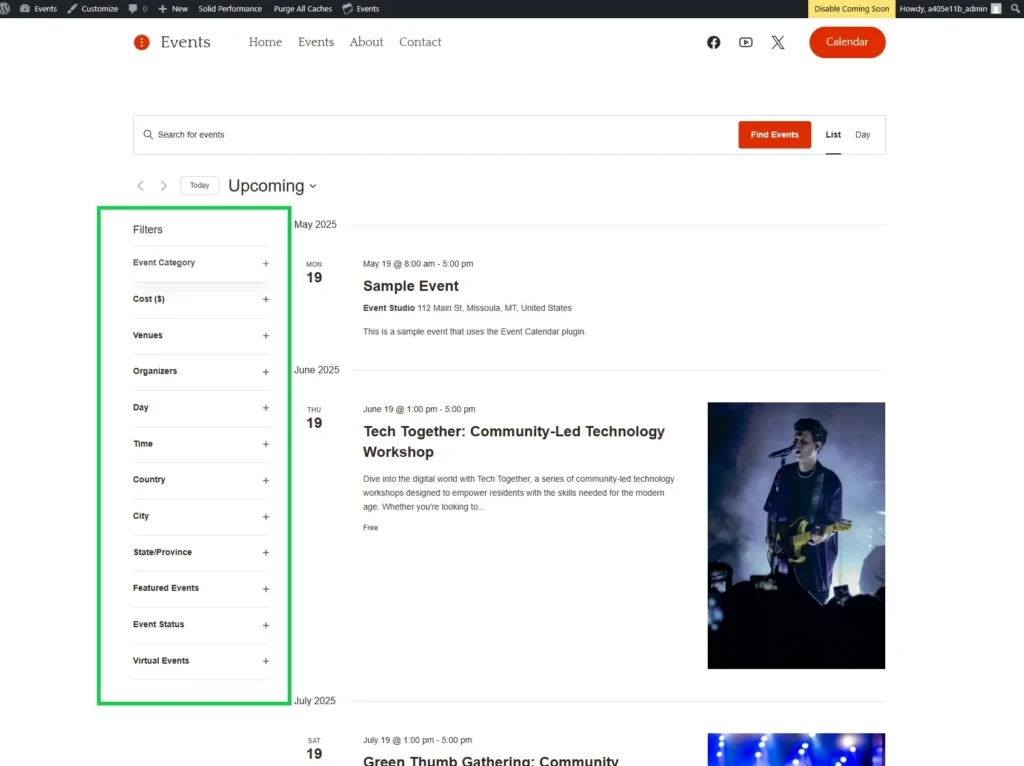
Smart Discovery: Helping Visitors Find Their Perfect Event with Filters
If you have dozens of events, visitors need a way to find what they want. The Filter Bar add-on (included in Plus plans and above) adds a powerful search and filter widget above your calendar.
Once enabled, visitors can filter your events by:
- Keyword (search)
- Category (e.g., Music, Food)
- Price (Free vs. Paid)
- Date Range (This week, This month)
This dramatically improves user experience and keeps people engaged on your site longer.
Step 9: Automated Promotion: Integrating with Promoter
Filling the Seats: Automated Email Marketing with Promoter
Getting people to your event requires promotion. The Promoter add-on (Ultimate plan) integrates email marketing directly into your events workflow.
To activate your Promoter account:
- Enable the Promoter add-on from your StellarSites dashboard.
- Navigate to Events > Settings > Promoter.
- You will be guided to connect your site to the Promoter service and configure your email settings.
Once set up, you can automatically send:
- Announcements when a new event is published.
- Reminders to registered attendees before the event starts.
- Follow-ups after the event concludes.
Step 10: Advanced Features: Managing Complex Events
The following premium add-ons handle specific, advanced use cases:
- Assigned Seating with Seating: For theaters, conferences, or dinners, this add-on allows you to create seat maps and let attendees choose their exact seat during checkout.
- Streamline Imports with Event Aggregator: Import events automatically from external sources like Google Calendar, iCal, or other event sites, saving you hours of manual data entry.
- Organize Multi-Day Events with Event Schedule Manager: Create intricate schedules with multiple sessions, tracks, and speakers for complex conferences or festivals.
- Expand Your Reach with Eventbrite Tickets: If you have an existing Eventbrite audience, this add-on lets you display and sell those tickets directly on your WordPress site, keeping traffic and branding consistent.
Conclusion: The Stage is Set—It’s Your Curtain Call
Building a powerful, professional events website is no longer a complex, expensive technical project. With StellarSites and The Events Calendar, you have an integrated, end-to-end solution that handles everything from the box office to the mailing list.
You have the vision for unforgettable events. Now you have the platform to bring them to life and share them with the world. Stop planning and start building.
Your audience is waiting. Launch Your Events Website Today!
FAQ: Getting Started with Events on StellarSites
Q: Do I need coding knowledge to build this?
A: No. The combination of StellarSites’ Site Assist, the Kadence theme, and The Events Calendar’s intuitive interface is designed for complete beginners. You can build a professional site without touching code.
Q: Can I sell tickets for free?
A: Yes. The Tickets Commerce system in the Plus plan and above has no additional fees beyond standard Stripe/PayPal payment processing. You keep more of your revenue.
Q: Is this good for online/virtual events?
A: Absolutely. The Virtual Events add-on (included in Essentials) makes it simple to add links for Zoom, Webex, and other meeting tools directly to your event pages.
Q: What if I need help?
A: StellarSites and The Events Calendar have extensive documentation and knowledge bases. Higher-tier plans include priority support for direct help.
Q: Can I upgrade my plan later?
A: Yes. You can start with Essentials and seamlessly upgrade to Plus or Ultimate to unlock more features as your events grow in size and complexity.
🔚 Final Thoughts & Affiliate Disclosure
📢 Affiliate Disclosure
DreamHosters is proudly reader-supported. If you choose to purchase or sign up through the links on our site, we may earn a small commission — at absolutely no extra cost to you.
These commissions do more than just sustain this platform — they directly support my ongoing medical recovery and continued cardiac care.
🫀 (You can read more in my personal story: I Am Born Again – My Open Heart Surgery Story.)
Every click, every purchase, is a gesture of support that helps me continue creating honest, helpful content for others on their own journeys.
🧭 Unbiased & Authentic Reviews
All reviews on DreamHosters are written with integrity — guided by consistent evaluation standards and free from external influence.
💡 Compensation never affects our rankings or conclusions — it simply helps keep this website running and supports the time and care invested in sharing value-driven insights with you.
🙏 From a heart that’s literally had a second chance — thank you for your support. 💙
🎁 Your Exclusive Bonus with StellarSites
When you choose StellarSites through our link, you don’t just unlock blazing-fast hosting — you also receive an exclusive resource bundle crafted for creators and entrepreneurs:
- 📚 Ultimate Web Hosting Handbook — 2026 Edition
1100+ pages | The Encyclopedia of Hosting, Security, Cloud & Emerging Tech
🌟 Enhanced Edition with strategic insights to future-proof your online business.
Value: ₹4,999 — yours FREE. - ⚡ Early Access to Our Hosting Tools & Checklists — streamline site setup, speed, and security.
- 🤝 Personal Support if you get stuck — we’re just an email away.
We believe in earning your click, not tricking it.
Every StellarSites signup via our link supports honest reviews, expert resources, and even fuels our personal recovery journey. 🙏💙