Contents
- 1 How to Install WordPress on Hostinger: Step-by-Step Beginner Guide (2026)
- 2 Before You Start: Complete Prerequisites Checklist
- 3 What is hPanel? Hostinger vs cPanel Explained
- 4 Step 1: Log in to Hostinger hPanel
- 5 Step 2: Add Your First Website
- 6 Step 3: “Who is this website for?”
- 7 Step 4: Enter Your Domain Name (Critical Step)
- 8 Step 5: Create Secure WordPress Login
- 9 Step 6: Connect External Domain (Namecheap → Hostinger)
- 10 Step 7: Verify Domain in Hostinger
- 11 Step 8: WordPress Auto-Installation Begins
- 12 Step 9: Access Your New WordPress Site
- 13 Post-Installation: First 5 Essential Steps
- 14 1. Install Recommended Theme
- 15 2. Install Core Plugins
- 16 3. Activate SSL
- 17 4. Enable Hostinger Cache
- 18 5. Update Permalinks
- 19 Troubleshooting: 8 Common Problems Fixed
- 20 FAQ: Your Questions Answered
- 21 Next Steps After Reading This Guide
How to Install WordPress on Hostinger: Step-by-Step Beginner Guide (2026)
Setting up your first WordPress website doesn’t need to be complicated. Hostinger makes WordPress installation incredibly simple with their one-click installer and beginner-friendly hPanel dashboard. In this detailed 2026 guide, I’ll walk you through every single step using my real setup of HostTests.com on Hostinger’s hosting.
I’ve captured actual screenshots from my own installation process, so you’ll see exactly what each screen looks like. Whether you’re building a blog, affiliate site, small business page, or testing platform like mine, this guide covers everything from domain connection to your first WordPress login.
What you’ll learn:
- How to connect external domains (Namecheap, GoDaddy, etc.)
- Complete WordPress auto-installation
- DNS propagation explained
- Post-install optimization tips
- Common errors and fixes
Time required: 15-30 minutes active setup + up to 48 hours for DNS propagation
Difficulty: Beginner-friendly
Cost: Hostinger Premium plan (₹599/mo)
Before You Start: Complete Prerequisites Checklist
Before clicking anything, make sure you have:
Active Hostinger hosting plan (Premium or Business recommended for WordPress)
Domain name ready (new purchase or existing from Namecheap/GoDaddy)
Email address for WordPress admin account
15-30 minutes of focused time
Pen and paper (or notes app) for passwords and nameservers
Backup of any existing website content (if migrating)
Pro tip: Hostinger’s Business plan gives you more resources for speed tests and traffic spikes, perfect if you’re doing hosting benchmarks like my Core Web Vitals project.
What is hPanel? Hostinger vs cPanel Explained
Hostinger uses hPanel, their custom dashboard built specifically for beginners. Unlike traditional cPanel (used by Bluehost, SiteGround), hPanel has:
- Cleaner interface with bigger buttons
- WordPress-focused tools in one place
- Real-time resource monitoring (CPU, RAM, disk usage)
- Built-in cache manager and security scanner
Why it matters: You won’t get lost hunting for WordPress tools across 50+ cPanel icons.
Step 1: Log in to Hostinger hPanel
Start here: Go to hostinger.com and click Login.
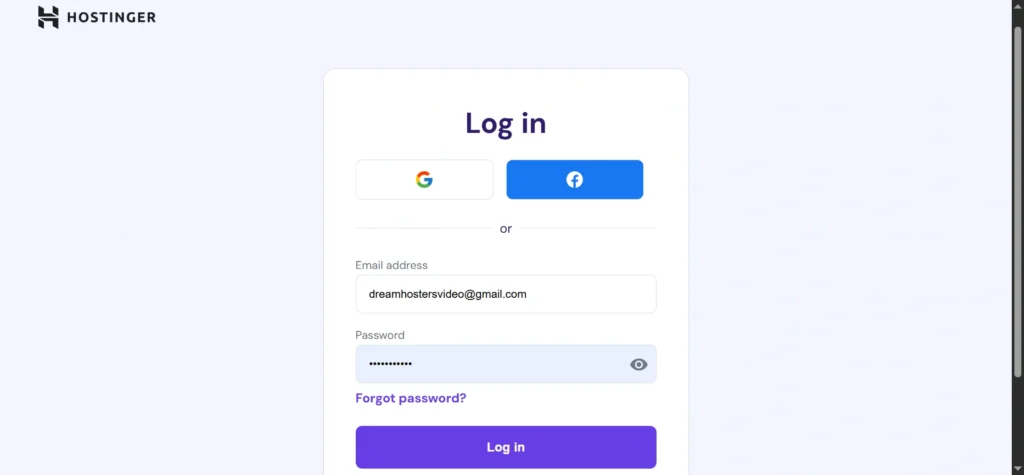
You’ll see the familiar Hostinger login screen. Enter your email and password used during signup.
Tip: Enable 2FA (two-factor authentication) immediately after first login for account security. Use Google Authenticator app.
Time estimate: 30 seconds
Once logged in, you’ll land on the main hPanel dashboard:
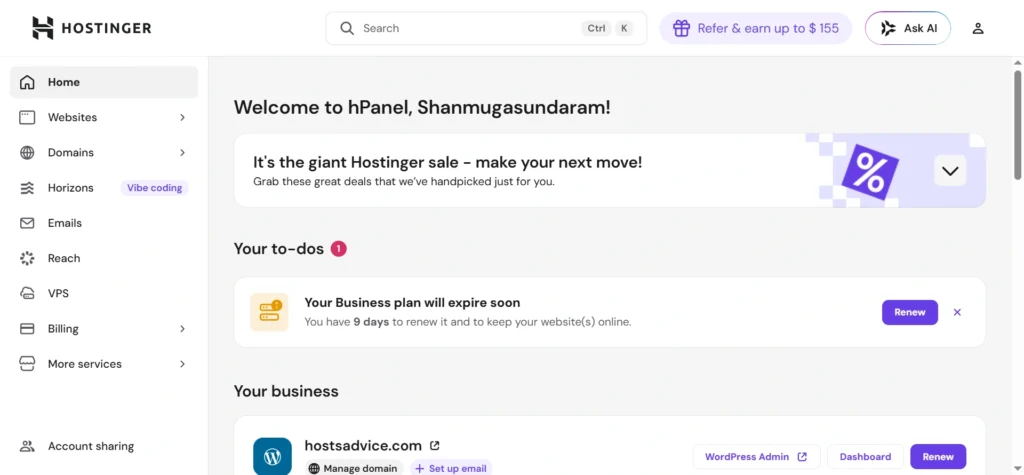
Key sections you’ll use today:
- Websites → Add new WordPress site
- Domains → Connect external domains
- Hosting → Resource usage monitoring
- Emails → Create admin email later
Tip: Notice the resource usage graphs at bottom (98% disk shown in my case). Keep under 80% for best performance during WordPress setup.
Step 2: Add Your First Website
From the Websites section, click the bright + Add website button:
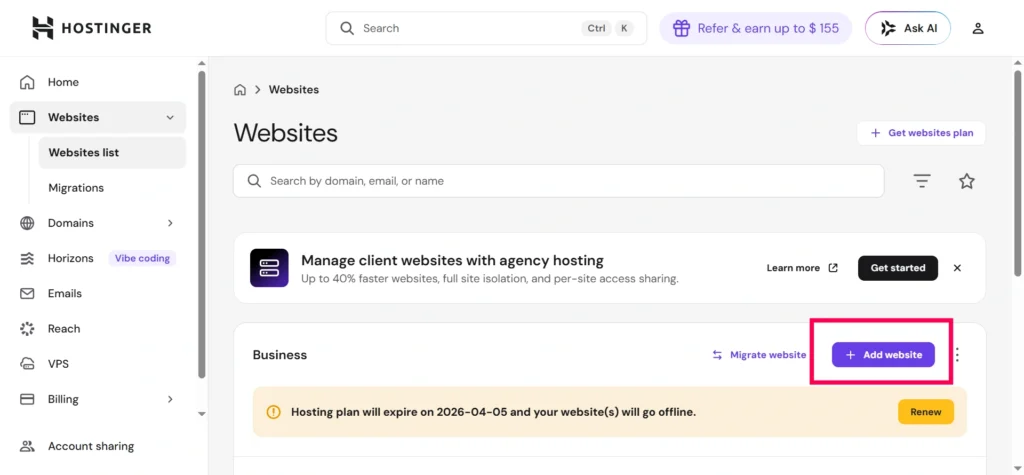
Important: Choose WordPress from the options, not “Build a website” or “Upload my site”. This triggers the automatic WordPress installer.
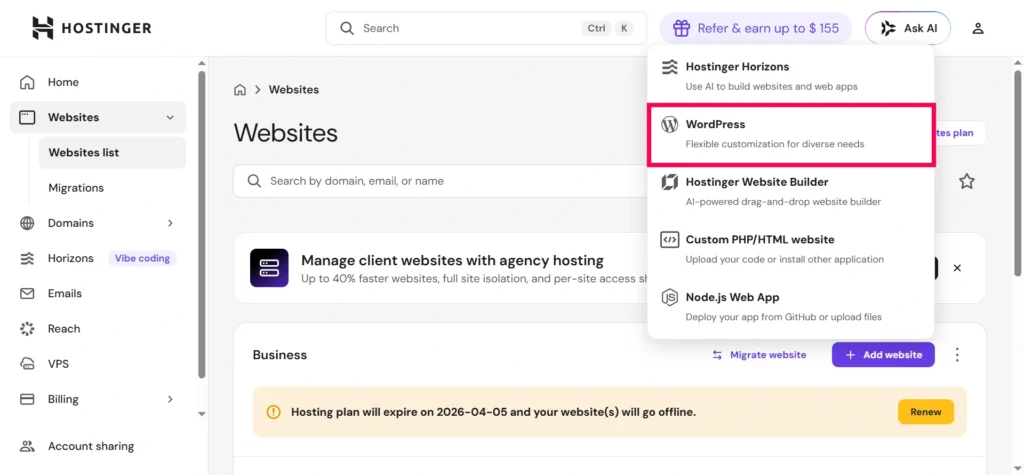
Tip: If you choose wrong option accidentally, click Cancel and restart. WordPress path gives you one-click installation + auto-SSL.
Step 3: “Who is this website for?”
Hostinger asks a simple question to customize your setup:
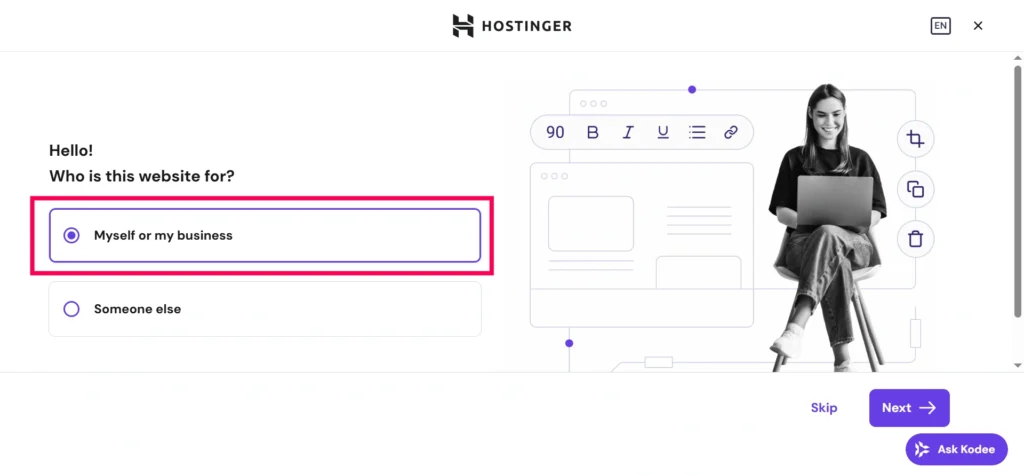
Choose: “Myself or my business” for blogs, affiliate sites, portfolios, or testing platforms like HostTests.com.
Choose: “Someone else” only for client/agency work.
Tip: This choice affects billing and resource limits later. Personal/business gets better renewal discounts.
Step 4: Enter Your Domain Name (Critical Step)
Now Hostinger asks for your domain – this is where most beginners get stuck:
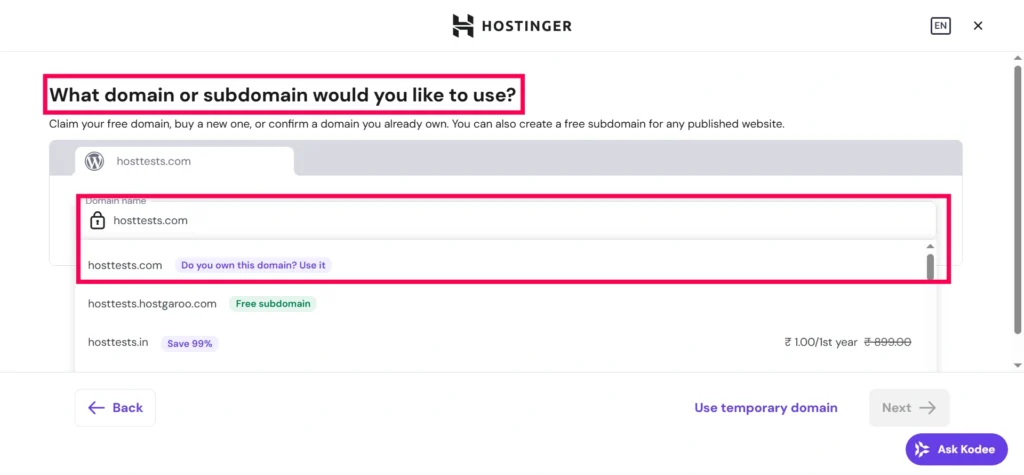
Enter exactly: hosttests.com (no www, no https://)
Three possible outcomes:
- Green checkmark = Domain already with Hostinger ✓
- Yellow warning = Domain at Namecheap/GoDaddy (my case) ⚠️
- Red error = Domain doesn’t exist ✗
Tip: If you see “Domain registered at another provider” (like my Namecheap domain), don’t panic. This is NORMAL and expected.
Step 5: Create Secure WordPress Login
Set up your WordPress admin credentials:
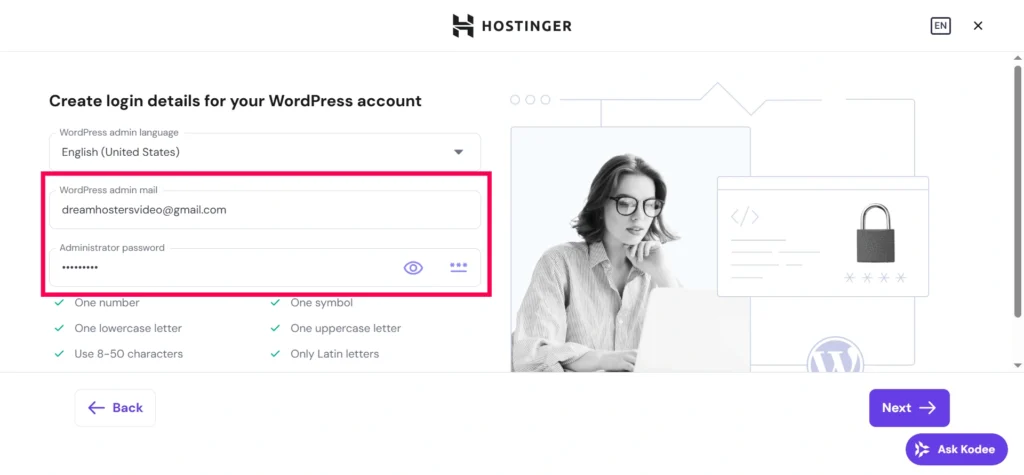
Must include:
One uppercase letter (A-Z)
One lowercase letter (a-z)
One number (0-9)
One special character (!@#$%)
Example: HostTests2026!wp
Tip: Use a password manager (LastPass, 1Password) to generate and save this. Never reuse passwords across sites.
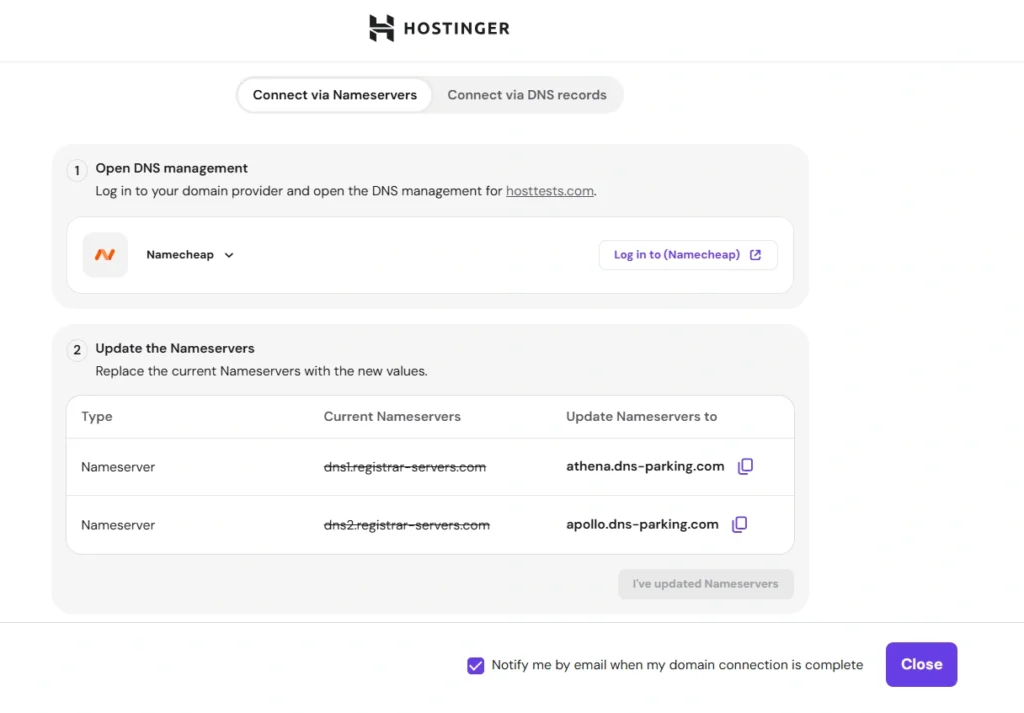
Step 6: Connect External Domain (Namecheap → Hostinger)
If your domain is with Hostinger: Skip to Step 7.
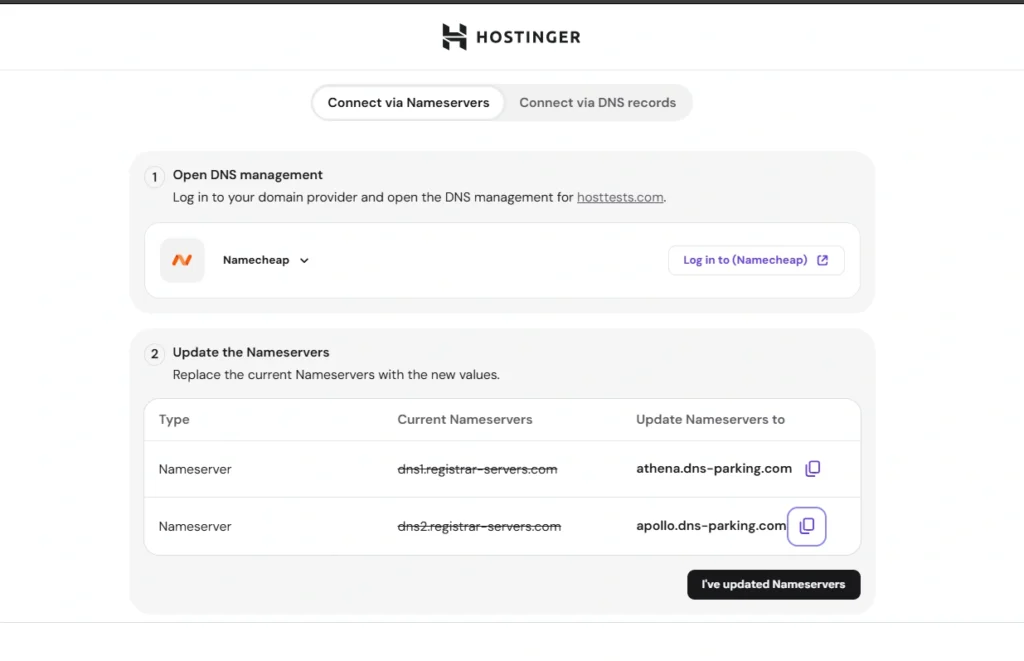
For Namecheap/GoDaddy users – Hostinger shows exact nameservers:
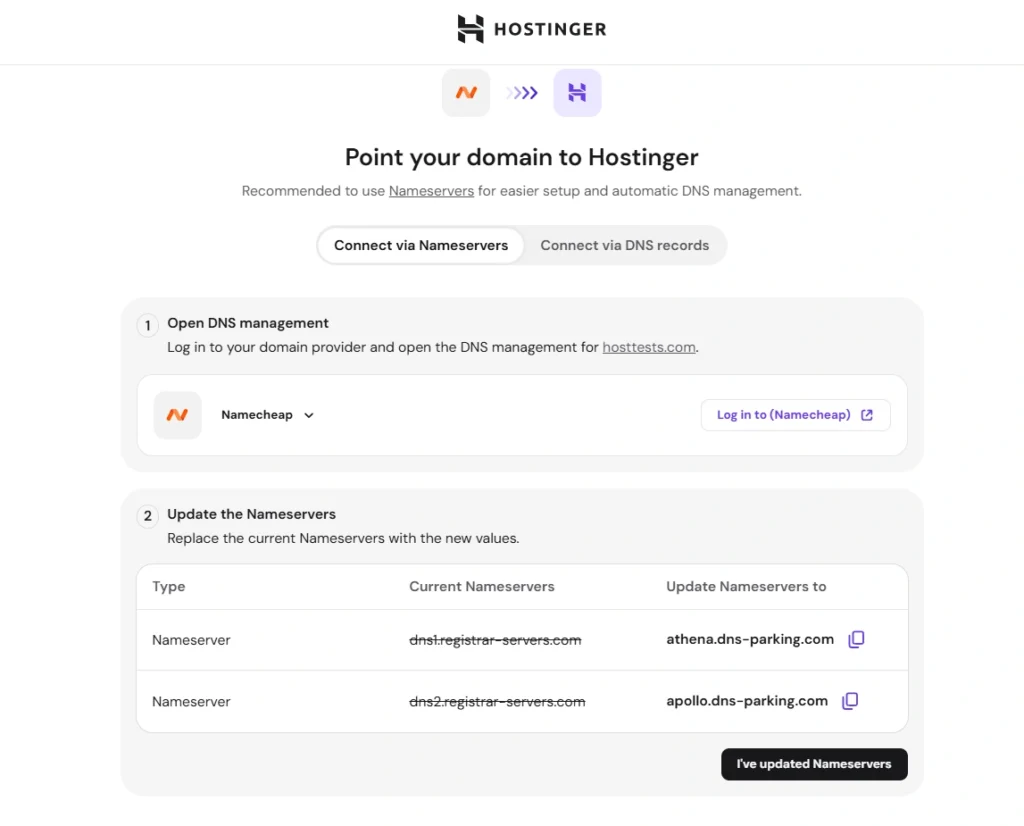
Copy these exactly:ns1.athena.dns-parking.com
ns2.apollo.dns-parking.com
Now open Namecheap dashboard:
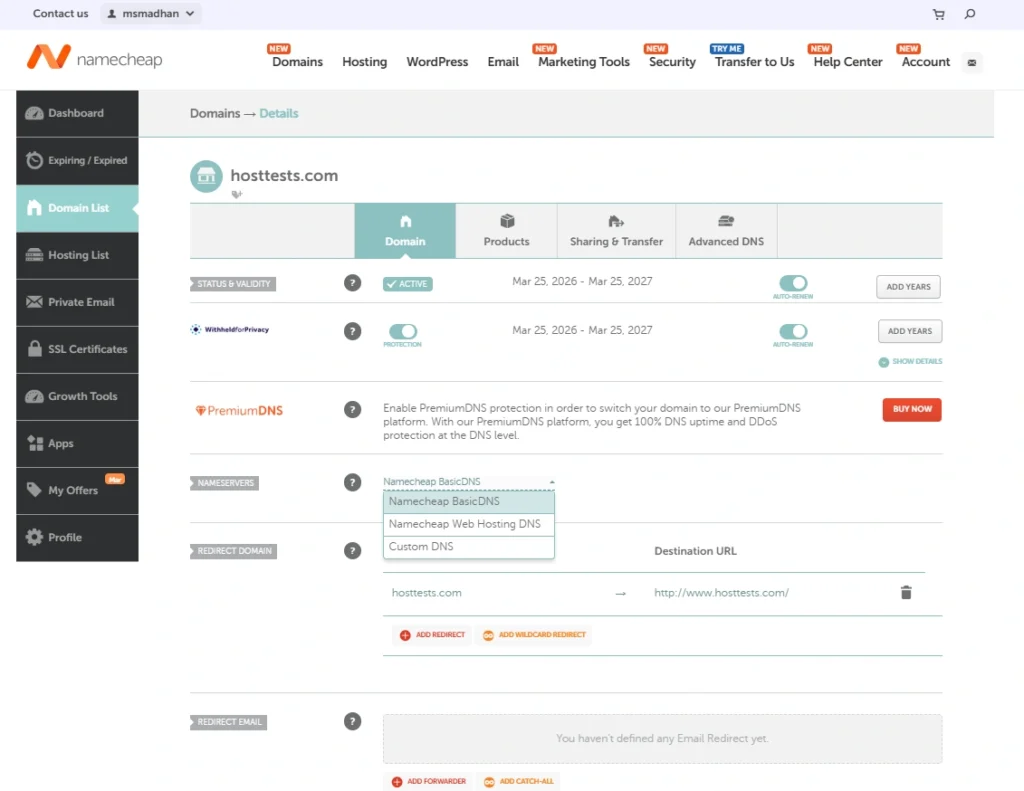
Go to Domain List → hosttests.com → Manage → Nameservers tab:
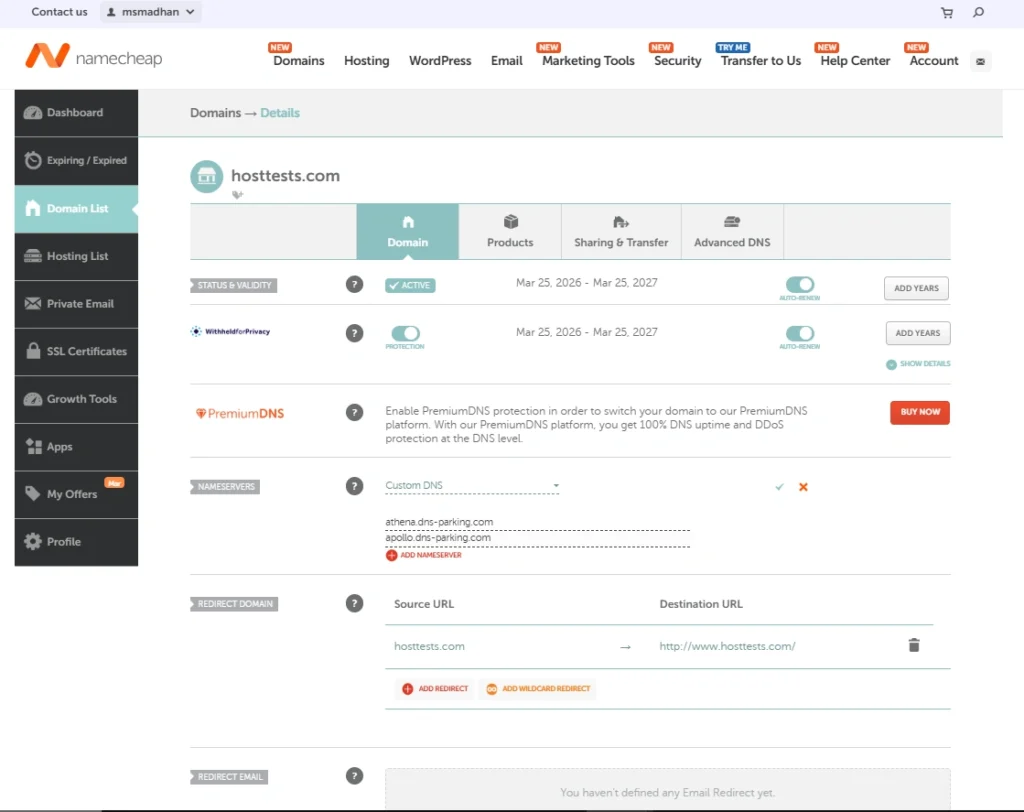
Select: Custom DNS → Paste Hostinger nameservers → Save
Namecheap confirms: “Changes Saved”
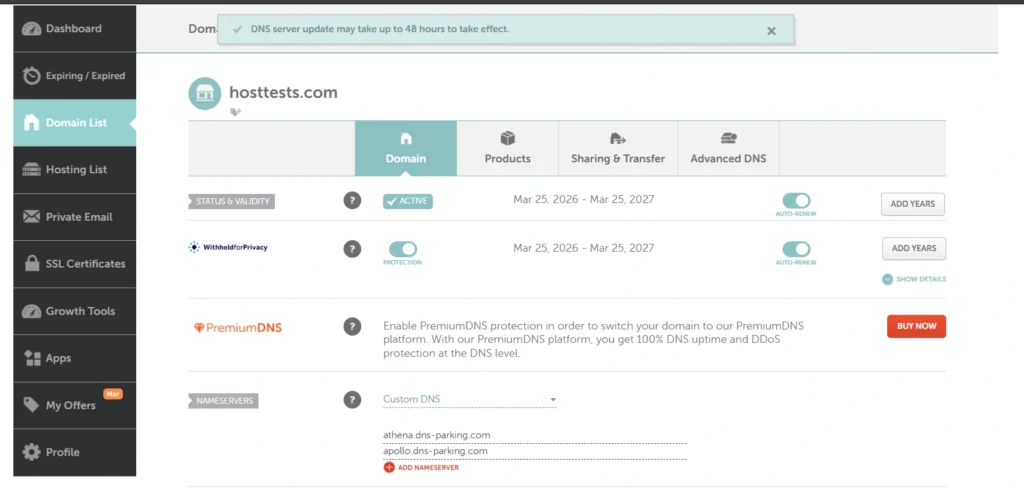
Tip: DNS propagation takes 24-48 hours globally.
Use whatsmydns.net to check progress from different countries.
Step 7: Verify Domain in Hostinger
Return to Hostinger and click “I’ve updated my nameservers”:
Wait 5-30 minutes, then refresh. Hostinger detects the change:
Perfect! Domain verified successfully.
Tip: If verification fails after 2 hours, double-check nameservers in Namecheap match EXACTLY (no typos, no extra spaces).
Step 8: WordPress Auto-Installation Begins
Hostinger now installs WordPress automatically:
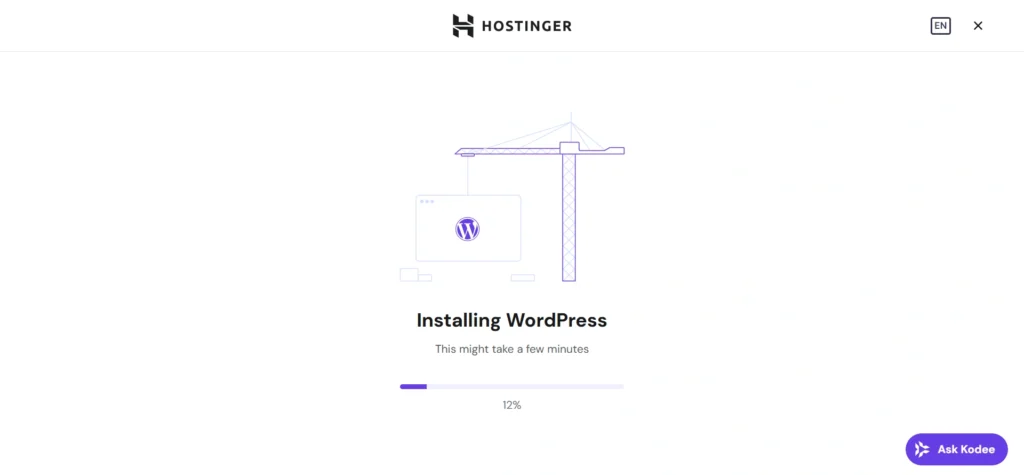
What happens behind the scenes:
- Downloads latest WordPress core
- Creates MySQL database
- Configures wp-config.php
- Sets file permissions
- Activates SSL certificate
Time: 2-5 minutes typically
Tip: Go grab coffee. Don’t refresh or close the window.
Step 9: Access Your New WordPress Site
Installation complete! Click WordPress Admin:
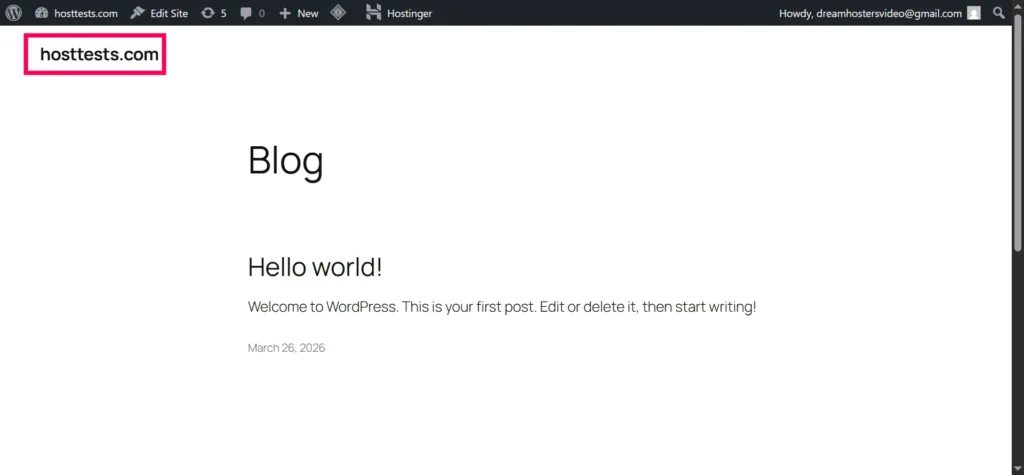
Your site is live at https://hosttests.com and admin at https://hosttests.com/wp-admin
Tip: Bookmark both URLs. Change default admin username from “admin” immediately via Users → Your Profile.
Post-Installation: First 5 Essential Steps
1. Install Recommended Theme
WordPress Dashboard → Appearance → Themes → Add New
Search: Astra or GeneratePress (both free, speed-optimized)
2. Install Core Plugins
Rank Math SEO (for rankings)
WP Super Cache (speed)
UpdraftPlus (backups)
Wordfence (security)
3. Activate SSL
hPanel → Security → SSL → Install Free SSL (takes 30 seconds)
4. Enable Hostinger Cache
hPanel → Advanced → Cache Manager → Purge All → Enable
5. Update Permalinks
WordPress → Settings → Permalinks → Post name → Save
Troubleshooting: 8 Common Problems Fixed
1. “Domain not verified” error
textFix: Wait 2+ hours, recheck Namecheap nameservers match exactly
2. WordPress login fails
textFix: Reset password via hPanel → Databases → phpMyAdmin
3. White screen after install
textFix: hPanel → Advanced → PHP Version → 8.1 → Restart service
4. Site loads slowly
textFix: Enable Hostinger cache + install WP Rocket ($59/year)
5. Nameservers not propagating
textCheck: whatsmydns.net → NS records → Green worldwide = ready
6. “Error establishing database”
textFix: Delete site → recreate → use different database name
7. SSL not working
textFix: hPanel → SSL → Force HTTPS → redirect all traffic
8. Admin email bounces
textFix: hPanel → Emails → Create new email account first
🙏 Disclosure & Thank You
This post contains affiliate links to WordPress.com.
If you purchase through my links, I earn a small commission at no extra cost to you. Thank you for supporting us – DreamHosters
FAQ: Your Questions Answered
Q: Can I use a free subdomain?
A: Yes! Choose “Use temporary domain” during setup, upgrade to custom domain later.
Q: Do I need to buy domain from Hostinger?
A: No. Namecheap, GoDaddy work perfectly with nameserver changes.
Q: How long until my site is live worldwide?
A: 80% live in 4 hours, 100% in 24-48 hours max.
Q: What if I make a mistake?
A: Delete website from hPanel → start fresh (takes 30 seconds).
Q: Is Hostinger good for SEO?
A: Yes. Fast TTFB + global CDN = Google PageSpeed 90+ scores.
Q: Can I migrate later?
A: Yes. Export via hPanel → UpdraftPlus plugin backs up everything.
Q: What’s the renewal price?
A: ~$8-12/month after intro period. Still cheaper than SiteGround.
Q: Do I need plugins immediately?
A: No. Test bare installation first, add 3-5 plugins max.
Q: Windows or Linux hosting?
A: Linux (default) for WordPress. Windows only if .NET/ASP.NET needed.
Next Steps After Reading This Guide
- Complete your installation using these exact steps
- Subscribe for my Hostinger speed test results tomorrow
- Share this guide if it helped (helps more beginners!)
- Watch my Hostinger vs AccuWeb comparison next week
Final pro tip: Always backup before major changes. UpdraftPlus + Google Drive = free daily backups forever.
Read my article Hostinger India Review for Hostinger’s Plan Features, Pricing, Support, Pros & Cons