
Contents
- 1 Verpex Hosting Setup Step-by-Step Guide for Beginners
- 2 What this guide covers
- 3 Step 1: Log in to your Verpex account
- 4 Step 2: Open cPanel
- 5 Step 3: Connect your domain
- 6 Quick domain tip
- 7 Step 4: Install WordPress
- 8 A clean start works best
- 9 Step 5: Check your WordPress login
- 10 Step 6: Install SSL
- 11 Why SSL matters
- 12 Step 7: Review backups
- 13 Step 8: Set up basic email
- 14 Step 9: Learn the DNS area
- 15 Step 10: Do a simple launch check
- 16 Common beginner mistakes
- 17 Practical setup order
- 18 Conclusion
- 19 Ready to Launch Your First Website?
- 20 FAQs Frequently Asked Questions:
Verpex Hosting Setup Step-by-Step Guide for Beginners
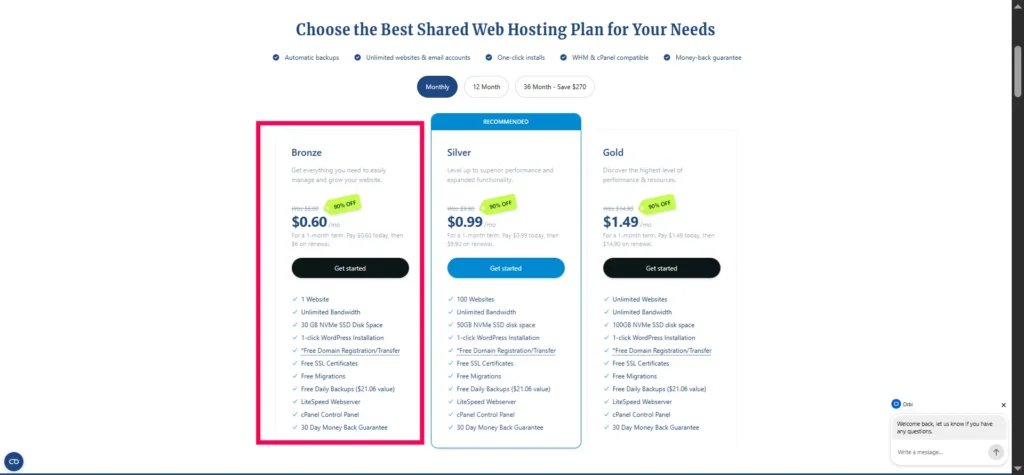
Starting a hosting account can feel confusing at first, but the process is usually simple once you see it in the right order. This guide walks you through a practical Verpex setup from login to launch, so you can understand what to do at each step and why it matters. Verpex supports cPanel-based management, WordPress installation through Softaculous, SSL setup, DNS management, and backups, so it is a good fit for a real beginner walkthrough.
TL;DR
This guide walks you through a real Verpex hosting setup from login to a live WordPress site. You learn how to access cPanel, connect your domain, install WordPress, enable SSL, set up basic email, review backups, and verify everything works.
Start Your Verpex Hosting SetupWhat this guide covers
You will learn how to move from a fresh Verpex account to a working website. That includes accessing your client area, opening cPanel, connecting a domain, installing WordPress, securing the site with SSL, and checking the basic settings that matter most at the start. This is the kind of setup process most beginners actually need, not just a theory-based explanation.
Step 1: Log in to your Verpex account
After buying a Verpex plan, the first thing to do is log in to the client area. From there, you can manage your hosting service and open the hosting control panel. Verpex’s own materials show that cPanel access is a core part of the setup flow, which is why this step comes first.
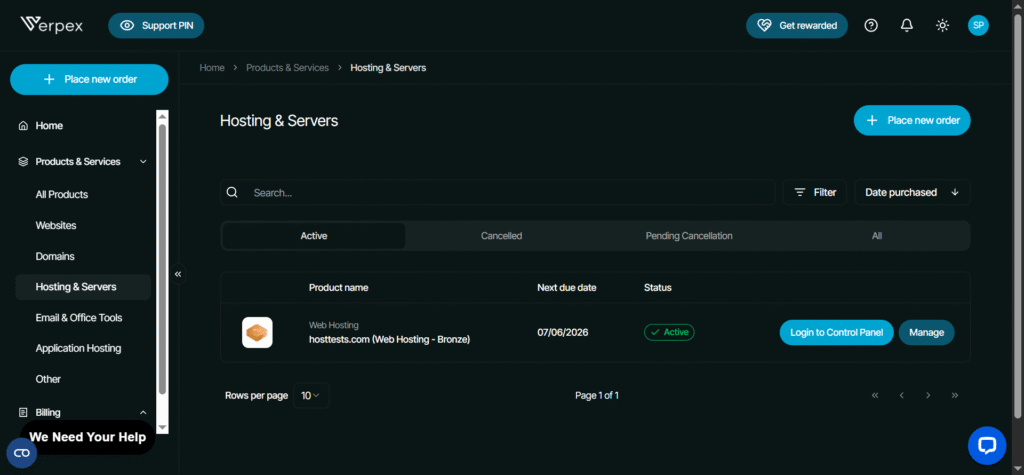
Inside the client area, look for your hosting product and click the manage option. If your plan includes cPanel access, you should see a direct login link. This saves time and avoids hunting for server details or separate credentials.
Step 2: Open cPanel
Once you are inside cPanel, you will see the main tools for your website. This is where most of the practical work happens, including domain setup, email, databases, SSL, and app installation. Verpex also highlights cPanel as the main control area for managing hosting tasks.
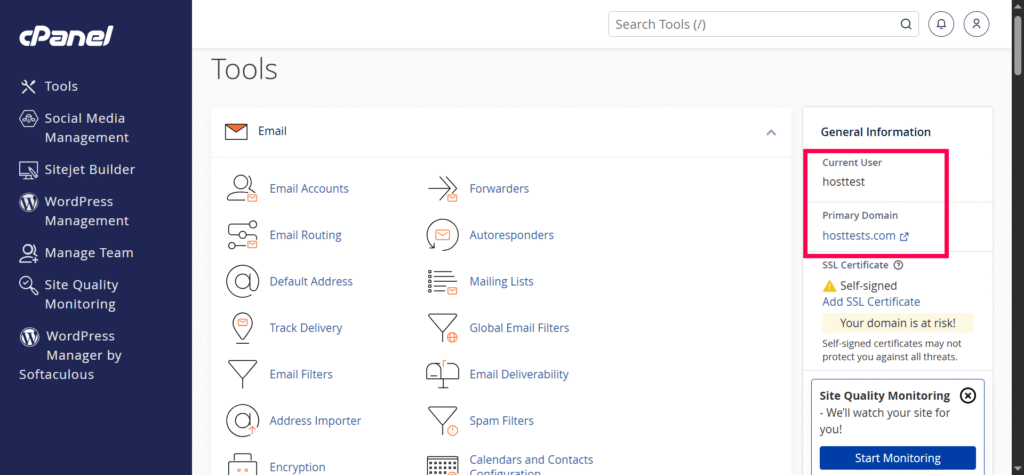
Take a few minutes to look around before clicking anything. Find the sections for WordPress, files, domains, and security. Knowing where these tools are makes the rest of the setup much easier.
Step 3: Connect your domain
If your domain is registered somewhere else, you usually need to point it to Verpex first. That is done by updating nameservers or DNS records, depending on where the domain is managed. Verpex’s knowledge base shows DNS management through cPanel, and its migration and setup guides also depend on correct domain pointing.
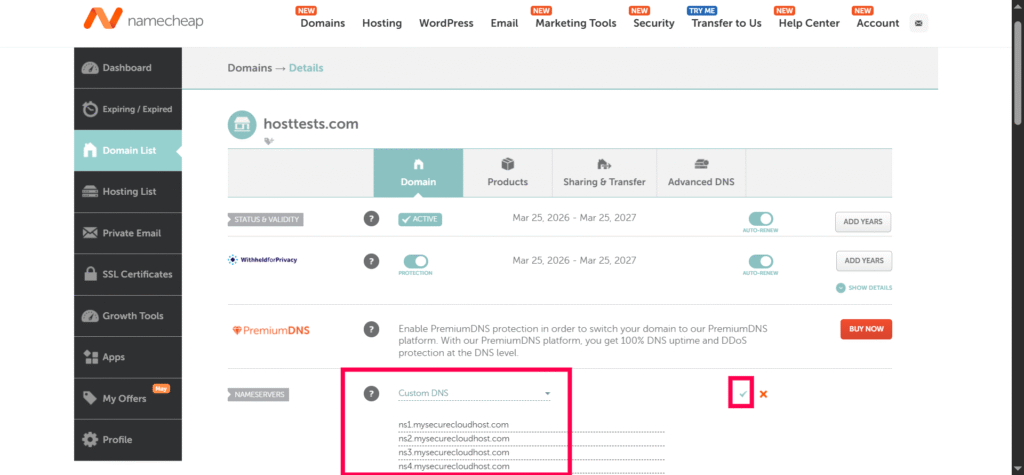
If your domain is already with Verpex, this step is usually faster. You may only need to choose the domain inside cPanel and continue with the installation. If the domain is not pointing correctly yet, your site will not load properly, so this step matters early in the process.
Quick domain tip
Use the domain you actually want to publish on. It sounds obvious, but many beginners install WordPress on a test subdomain and then later forget to move it. Choosing the right domain from the start keeps the setup clean.
Step 4: Install WordPress
For most beginners, WordPress is the simplest way to build a site on Verpex. Verpex tutorials show WordPress installation through cPanel and Softaculous, which is the usual beginner-friendly path. You select the domain, set an admin username and password, and click install.
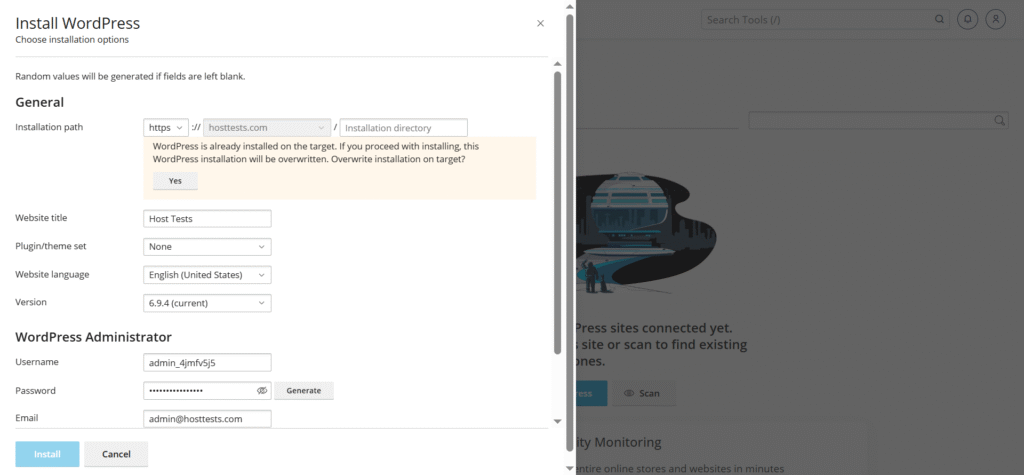
During setup, choose strong login details. This is one of the few small steps that really protects you later. Many tutorials also suggest keeping the installation simple at first and adding plugins later from the WordPress dashboard.
A clean start works best
A first site does not need too many extras. Install WordPress, make sure it works, then add only the plugins you truly need. That keeps the site easier to manage and reduces confusion while you are still learning.
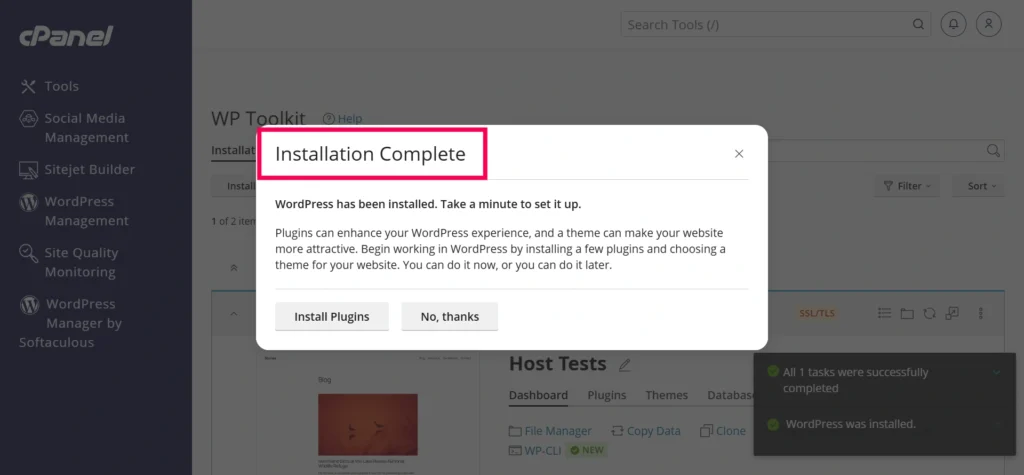
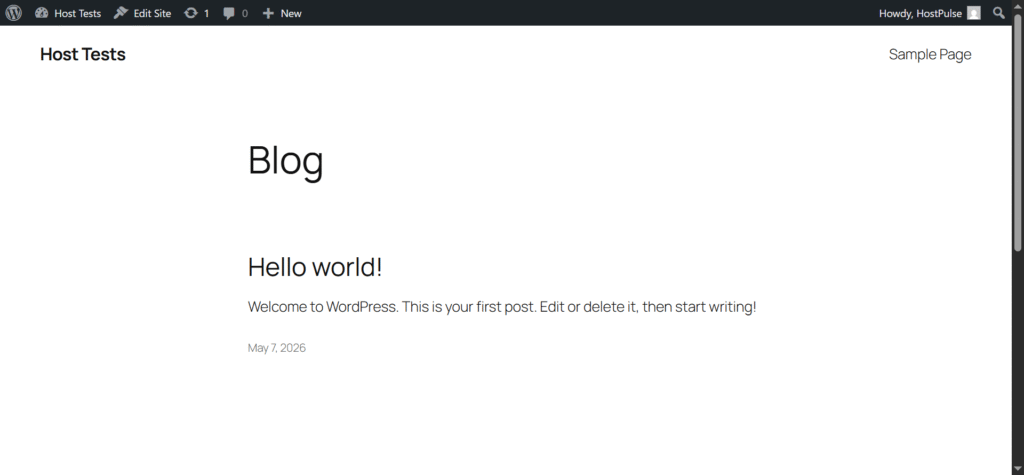
Step 5: Check your WordPress login
After installation, Verpex or Softaculous will give you the WordPress admin link. Save it somewhere safe, because this is where you will write posts, change the design, and manage settings. If you lose it, you can still reach it through your domain by adding /wp-admin, but it is better to bookmark it now.
Log in once and confirm that the dashboard opens correctly. If you can reach the WordPress admin area, the main setup is already working. At this stage, do not worry about design or content yet, just confirm that access is fine.
Step 6: Install SSL
SSL is what makes your site use HTTPS instead of plain HTTP. It helps protect data and is now standard for most websites. Verpex provides SSL-related setup in its knowledge base, and its guides show certificate installation and SSL management steps.
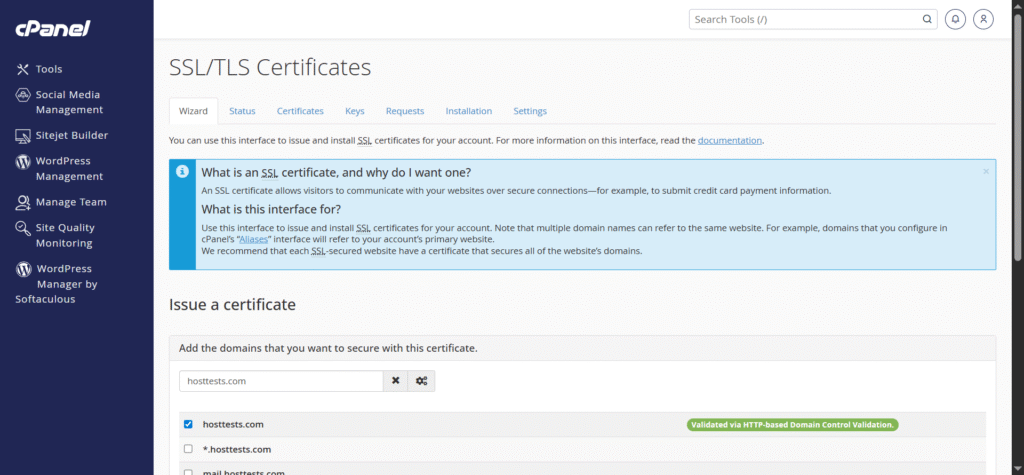
In many cases, SSL activates automatically, but it is still worth checking. Visit your site in the browser and see whether it loads with HTTPS. If not, check the SSL area in cPanel or the Verpex control panel and run the needed security action.
Why SSL matters
A site without SSL can look unfinished to visitors. It may also cause browser warnings, which can scare people away. For a new blog, portfolio, or niche site, SSL should be one of the first things you verify after install.
Step 7: Review backups
Backups are easy to ignore when a site is new, but they matter from day one. Verpex has documentation for backup and restore using Backuply, which means you have a clear recovery path if something breaks later.
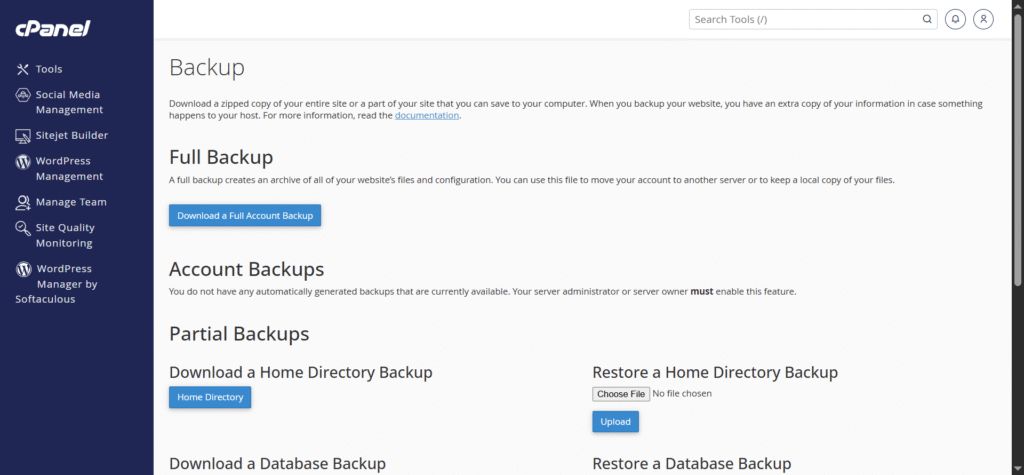
Check whether your plan includes backups and how often they run. If there is a manual backup option, learn where it is before you need it. A five-minute check now can save you a lot of trouble later.
Step 8: Set up basic email
If your site is for a business, blog, or portfolio, a custom email address looks more professional than a free email service. Most hosting accounts let you create email accounts from cPanel. This is one of the easiest early tasks after the site is live.
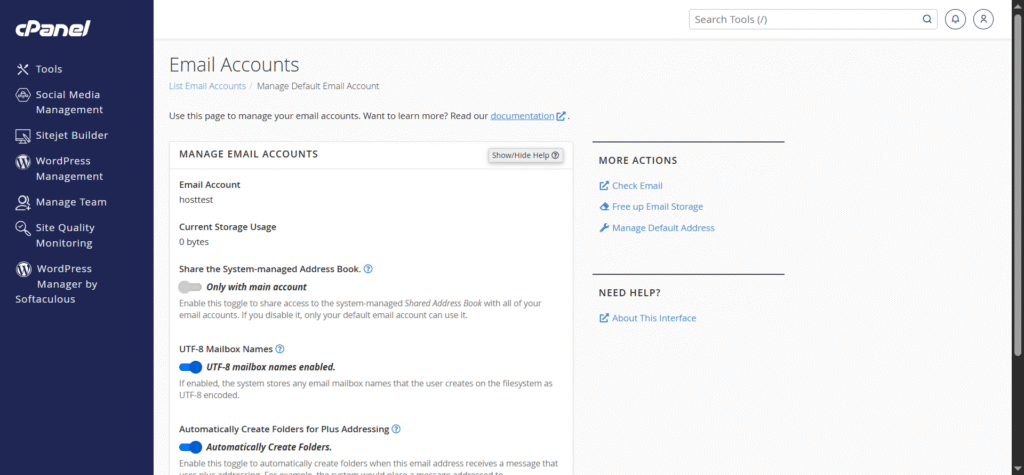
Use one email for site admin tasks and another for contact forms if needed. That small separation helps keep messages organized. It is a simple habit, but it makes the account easier to manage as your site grows.
Step 9: Learn the DNS area
If you plan to add subdomains, connect third-party services, or verify apps like email tools, DNS becomes useful quickly. Verpex documents DNS editing through cPanel’s Zone Editor, including A, CNAME, TXT, and other record types.
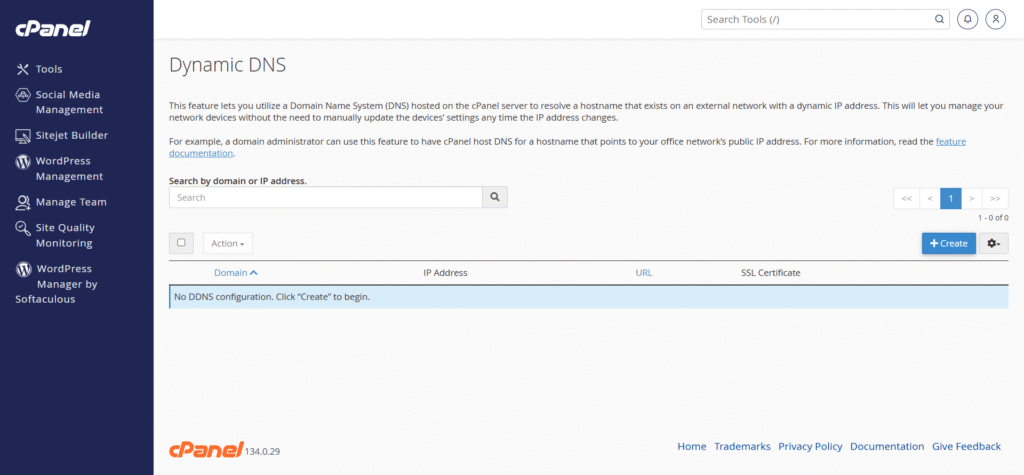
You do not need to memorize every record type on day one. Just know where the DNS area is and how to open it. When you later need to verify a service or point a subdomain, you will already know where to go.
Step 10: Do a simple launch check
Before you publish, visit the homepage, test the WordPress login, and make sure HTTPS is active. Also check that the domain resolves correctly and that no error page appears. These are small checks, but they tell you whether the setup is truly complete.
If everything loads properly, you are ready to start building pages and writing content. That is the real goal of a first hosting setup. The technical part should disappear into the background so you can focus on the site itself.
👉📖 Read Verpex Full Review 👈
Common beginner mistakes
A lot of first-time users run into the same avoidable issues. The most common ones are using the wrong domain during install, forgetting to point the nameservers, skipping SSL checks, and not saving the WordPress login URL. These are simple mistakes, but they can waste time.
Another common issue is adding too many plugins too early. It is better to install the site first, test it, and then add features step by step. That keeps the site lighter and easier to troubleshoot.
Practical setup order
If you want a simple order to follow, use this:
- Log in to the Verpex client area.
- Open cPanel.
- Point your domain to Verpex if needed.
- Install WordPress with Softaculous.
- Confirm the admin login works.
- Check SSL.
- Review backups.
- Create email if needed.
- Review DNS settings.
- Test the live site.
This sequence matches how a real beginner usually works through a hosting account. It also keeps the article practical instead of abstract.
Conclusion
A good hosting setup is not about knowing every technical detail. It is about completing the right steps in the right order, then checking that the site is live, secure, and easy to manage. Verpex supports that kind of beginner-friendly setup through cPanel, WordPress installation, SSL, DNS tools, and backup options.
For your article series, this title works especially well because it lets you show the real process instead of just describing hosting in theory. That makes it useful for beginners, and it gives you a strong base for later posts about WordPress, SSL, backups, and domain setup.
Ready to Launch Your First Website?
Follow the exact same Verpex setup shown in this guide and create your own WordPress website step-by-step without technical confusion. Perfect for beginners, bloggers, niche sites, portfolios, and first online projects.
Get Started with Verpex Hosting NowBeginner-friendly setup • Fast hosting • WordPress ready • Global servers
🙏 Disclosure & Thank You
This post contains affiliate links to Verpex.
If you purchase through my links, I earn a small commission at no extra cost to you. Thank you for supporting us – DreamHosters
FAQs Frequently Asked Questions:
1. What is Verpex hosting setup?
Verpex hosting setup is the process of creating a working website using a Verpex hosting account. It includes logging in, opening cPanel, connecting a domain, installing WordPress, enabling SSL, and checking basic settings such as backups and email.
2. How do I start Verpex hosting setup step by step?
To start Verpex hosting setup, log in to your Verpex client area, open cPanel, point your domain to Verpex (if needed), install WordPress through Softaculous, confirm the WordPress login works, enable SSL, and test that your site loads correctly.
3. Do I need technical skills to set up Verpex hosting?
No, you do not need advanced technical skills. Verpex uses cPanel and one‑click tools like Softaculous, so beginners can follow simple steps such as selecting a domain, clicking install, and reviewing basic settings without editing server code.
4. How long does Verpex hosting setup take?
For a simple WordPress site, Verpex hosting setup usually takes 10–20 minutes if the domain is already pointed correctly. The time mainly depends on how quickly you connect the domain, complete the WordPress install, and verify SSL.
5. Where can I try Verpex hosting for beginners?
You can sign up for Verpex hosting and follow this step‑by‑step guide here:
Start Verpex Hosting Setup Now