
Contents
- 1 How to Launch a WooCommerce Store on WordPress.com – 2026
- 2 Introduction
- 3 The Main Requirement
- 4 Step 1: Choose a Plan
- 5 Step 2: Install WooCommerce
- 6 Step 3: Configure Store Settings
- 7 Step 4: Set Up Payments
- 8 Step 5: Set Shipping and Taxes
- 9 Step 6: Add Your First Products
- 10 Product Types
- 11 Product Fields
- 12 Digital Products
- 13 Step 7: Create Core Pages
- 14 Step 8: Design the Store
- 15 Step 9: Add Useful Plugins
- 16 Step 10: Improve Navigation
- 17 Step 11: Manage Orders
- 18 Step 12: Test Before Launch
- 19 Step 13: Launch the Store
- 20 Step 14: Market It
- 21 Step 15: Improve Conversions
- 22 Step 16: Track Performance
- 23 Step 17: Common Issues
- 24 Final Verdict
- 25 🎬 Watch the Full Video Tutorial
- 26 FAQs
- 27 Do I need coding skills?
- 28 Can I use multiple payment methods?
- 29 Is WooCommerce free?
- 30 Can I sell digital products?
- 31 Do I need hosting?
How to Launch a WooCommerce Store on WordPress.com – 2026
This guide shows you how to build and launch a WooCommerce store on WordPress.com from scratch. It is written for beginners who want a simple setup without dealing with hosting or technical complications.
Introduction
Starting an online store used to feel overwhelming. You had to buy hosting, install WordPress manually, manage security, and then figure out WooCommerce on top of all that.
That is no longer the case. WordPress.com can simplify the process by handling the technical side for you, but you must use a paid plan that supports plugins before WooCommerce can be installed.
If you want a beginner-friendly way to launch an online store, this setup is one of the easiest paths available. WooCommerce provides the store engine, while WordPress.com handles much of the maintenance in the background.
TL;DR – Launch Your Store in 5 Steps
👉 Want to build your site using the WordPress.com AI Website Builder? Read this complete step-by-step guide .
The Main Requirement
Before anything else, make sure your WordPress.com plan supports plugins. WooCommerce can be installed on WordPress.com only on plans that allow plugin access, so lower-tier plans will not work for this setup.
This matters because WooCommerce is a plugin, and without plugin access, you cannot add ecommerce functionality to the site. Once you upgrade to a supported plan, the WooCommerce installation path opens up in your dashboard.
Step 1: Choose a Plan
The first step is choosing the right WordPress.com plan for ecommerce. If you want to run WooCommerce, make sure you are on a plan that supports plugins and store functionality.
WordPress.com’s ecommerce setup begins only after plugin access is available, so this is the most important checkpoint in the whole process. For beginners, the advantage is simple: no separate hosting setup, no manual server management, and fewer technical tasks to maintain.
If your goal is to launch quickly and keep the process simple, this is a solid starting point. The official WooCommerce setup flow also assumes you will proceed through a guided onboarding wizard after activation.
👉 Check current WordPress.com plans here
Step 2: Install WooCommerce
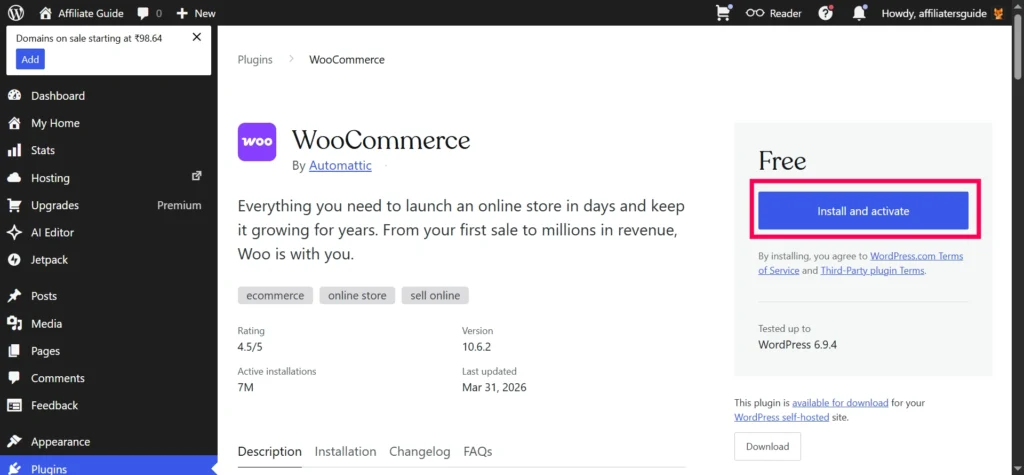
After upgrading your plan, go to your WordPress dashboard and open the Plugins area. Click Add New, search for WooCommerce, then install and activate the official plugin by Automattic.
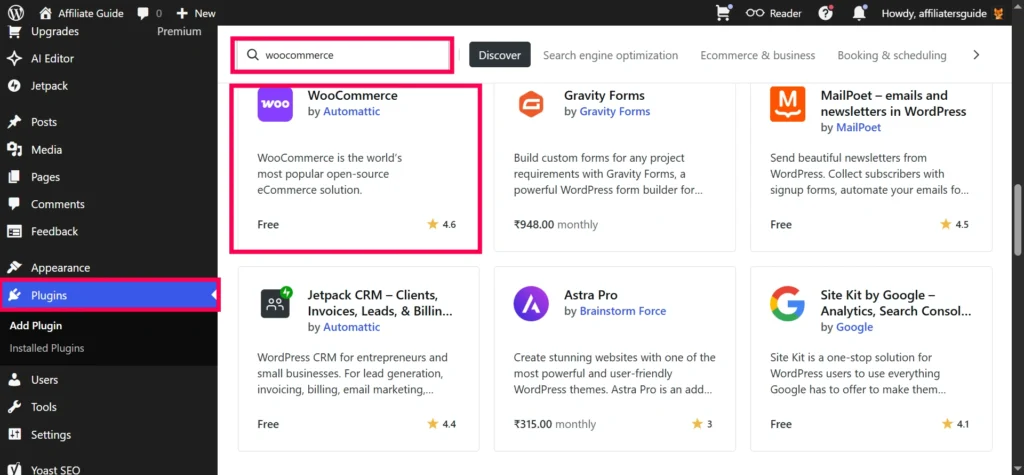
Click Install and activate
Once WooCommerce is activated, the setup wizard will appear. This wizard is useful because it walks you through the first configuration steps instead of leaving you to figure everything out manually.
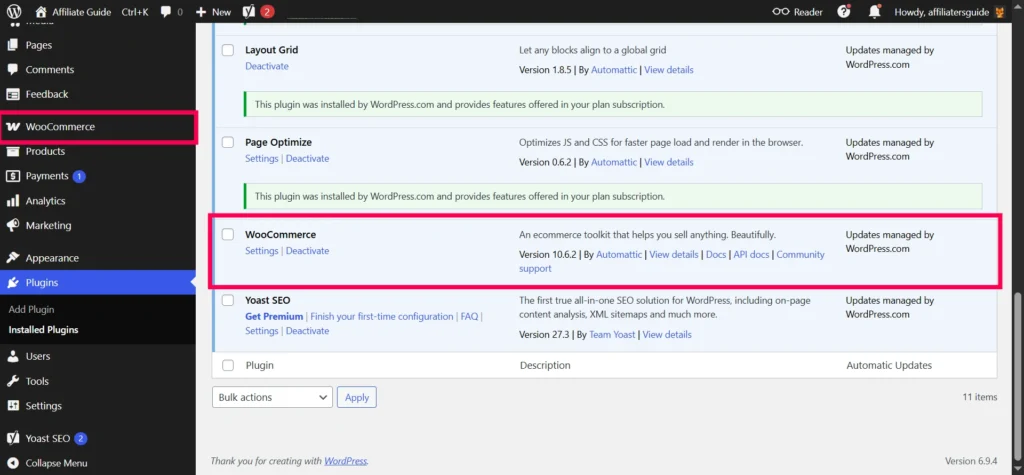
During this setup, you will be asked for basic store details such as your location, what you plan to sell, and how you want to configure the store. That gets the core store framework in place before you start adding products.
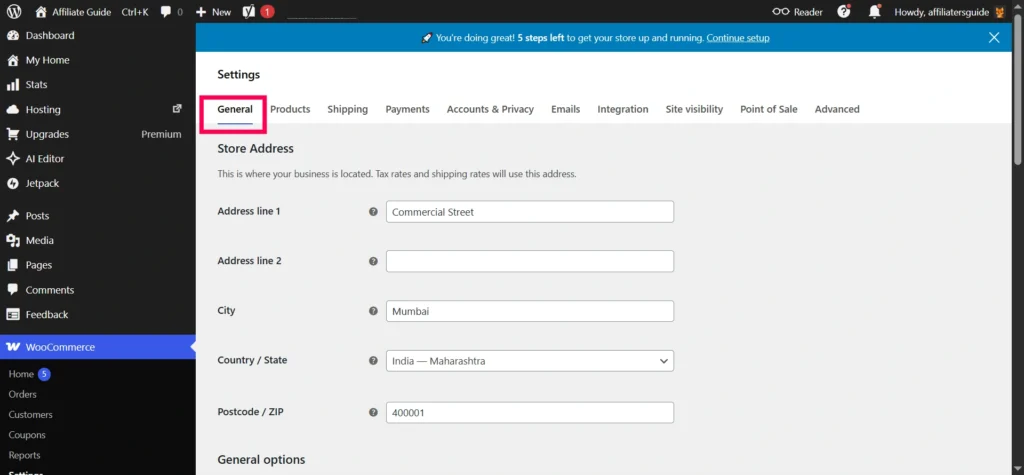
Step 3: Configure Store Settings
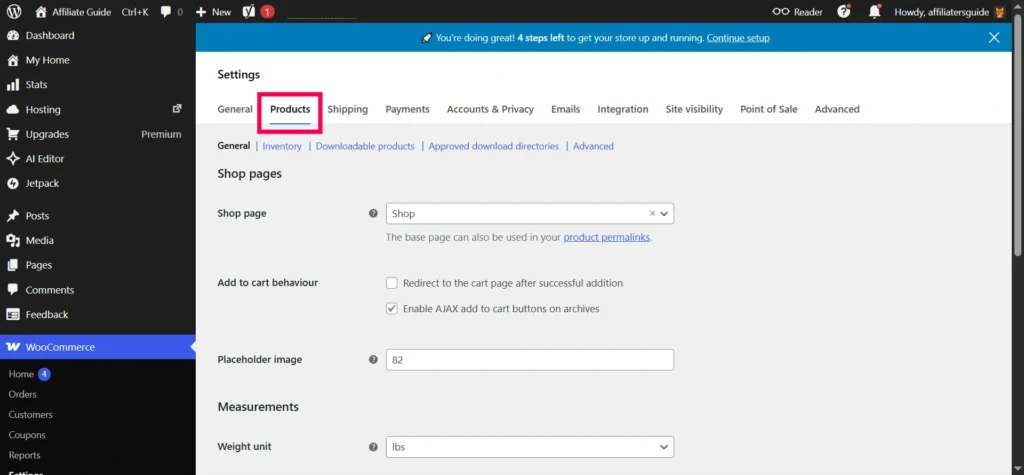
After installation, go to WooCommerce → Settings to review the basics. Start with your store address, currency, selling locations, and customer account options.
General Settings
- Store address – Used for tax calculations and shipping.
- Currency – Choose your local currency (USD, EUR, INR, etc.).
- Currency position – Left, right, or with space.
- Selling locations – Sell to all countries or specific ones.
- Customer accounts – Allow customers to create accounts during checkout.
For digital-only stores, you can simplify things by disabling shipping-related options. For physical stores, keep both shipping and tax settings active so the checkout process works properly.
Step 4: Set Up Payments
A store without payments cannot make sales, so this step is critical. Go to WooCommerce → Settings → Payments and enable the gateways you want to use.
WooPayments, PayPal, and Stripe are common starting options, depending on your region and business model. WooCommerce also supports offline methods like bank transfer and cash on delivery in many store setups.
Before going live, use test mode and place a few trial orders. That helps confirm that payments, order emails, and checkout behavior are all working correctly.
Step 5: Set Shipping and Taxes
If you sell physical products, create shipping zones first. A shipping zone is a geographic area where specific rates and methods apply, such as India, your local city, or international customers.
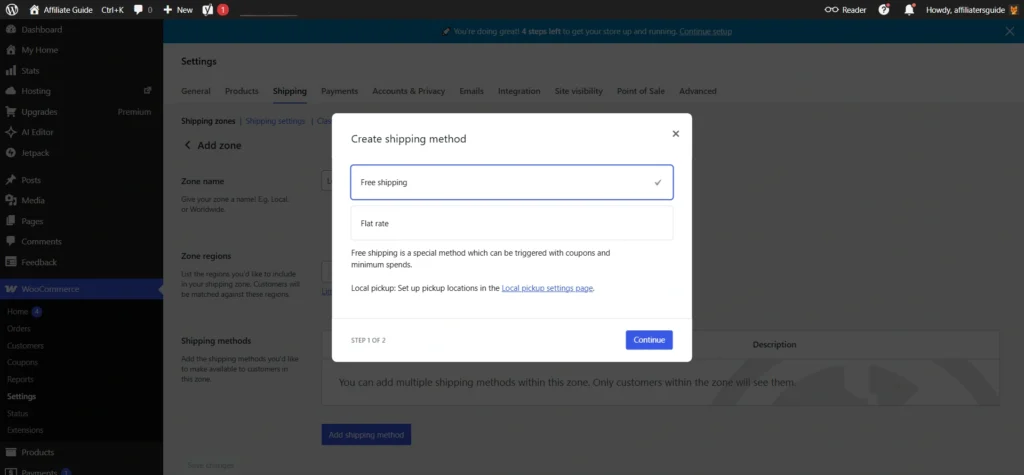
Inside each shipping zone, you can add flat rate shipping, free shipping, or local pickup. You can also set conditions, such as free shipping above a certain order value.
Tax rules depend on your country and business type, so review them carefully. WooCommerce provides tax settings, but you should still verify them against your local requirements before launch.
Step 6: Add Your First Products
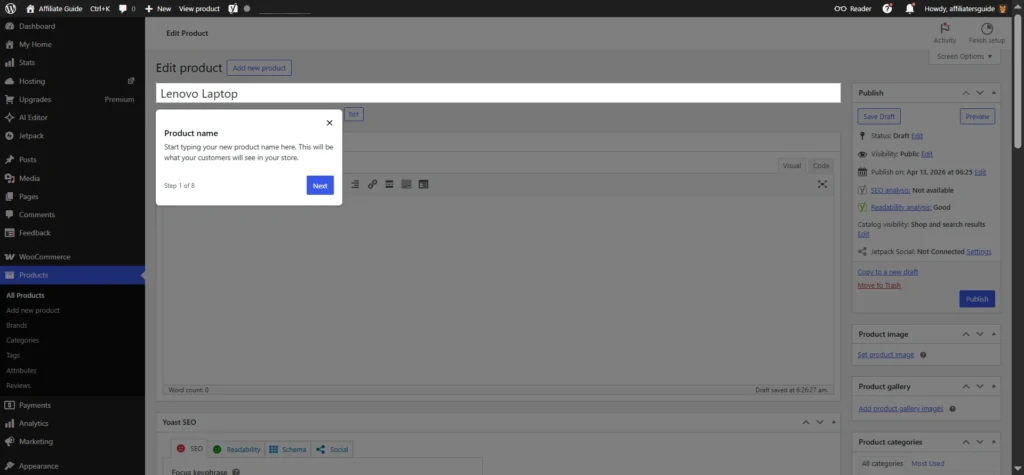
Now comes the most important part: adding products. Go to Products → Add New to open the product editor.
Start with a clear title, then write a product description that explains the benefit, not just the features. Add a strong main image and a few gallery images so shoppers can see the product clearly.
Product Types
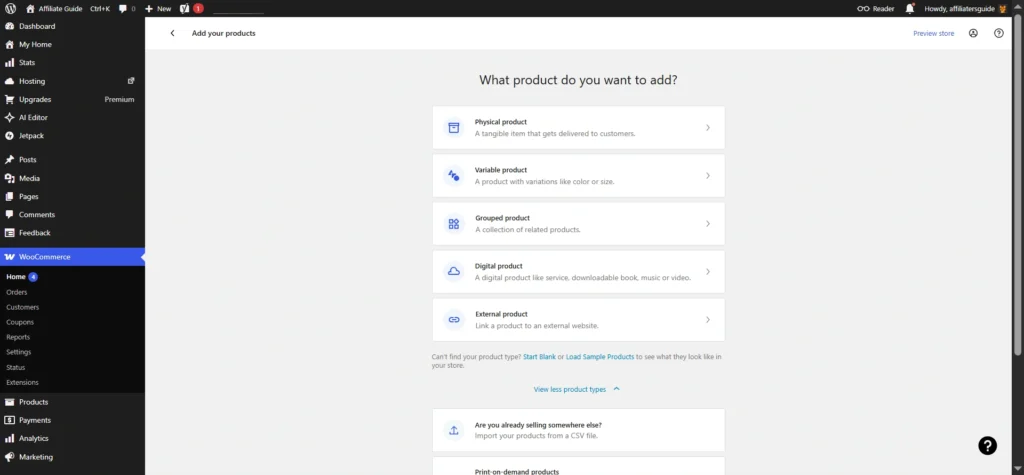
- Simple product: one item with no variations.
- Variable product: items with choices such as size, color, or style.
- Grouped product: related products shown together.
- External or affiliate product: listed on your site but purchased elsewhere.
- Digital product: non-physical items such as ebooks, files, music, or software.
Product Fields
- Title: Clear and descriptive product name.
- Short description: A concise summary shown near the top of the product page.
- Main description: Full product details, features, and benefits.
- Product image: High-quality featured image.
- Gallery: Extra product angles or lifestyle images.
- Price: Regular and sale price if needed.
- Inventory: SKU, stock quantity, and backorder settings.
- Categories and tags: Helps shoppers browse your catalog.
Digital Products
For digital products, select Simple Product, then check Virtual and Downloadable in the product settings. After that, upload your file and configure download access as needed.
This is the cleanest way to sell ebooks, templates, audio files, downloadable guides, or software from WooCommerce. Once published, the product will behave like a digital item instead of a shipped product.
Pro tip: Add 5–10 products before launching. A store with fewer than 3 products looks unfinished.
Step 7: Create Core Pages
WooCommerce creates important shop pages automatically, including Cart and Checkout, but you still need several core pages for trust and professionalism. At minimum, create or confirm your homepage, About page, Contact page, Shipping Policy, Refund Policy, and Privacy Policy.
These pages reduce confusion and make your store feel legitimate. A clear policy structure also helps customers feel safer before paying.
If you are selling digital products, add a Download Policy or Digital Delivery note so buyers understand how access works. That can reduce support questions later.
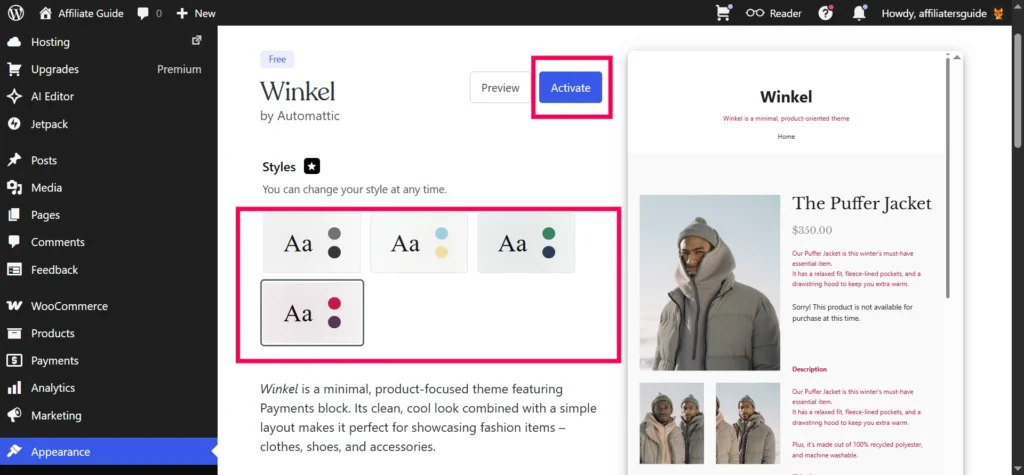
Step 8: Design the Store
Design matters because it affects trust and conversions. A clean, simple layout usually performs better than a cluttered one.
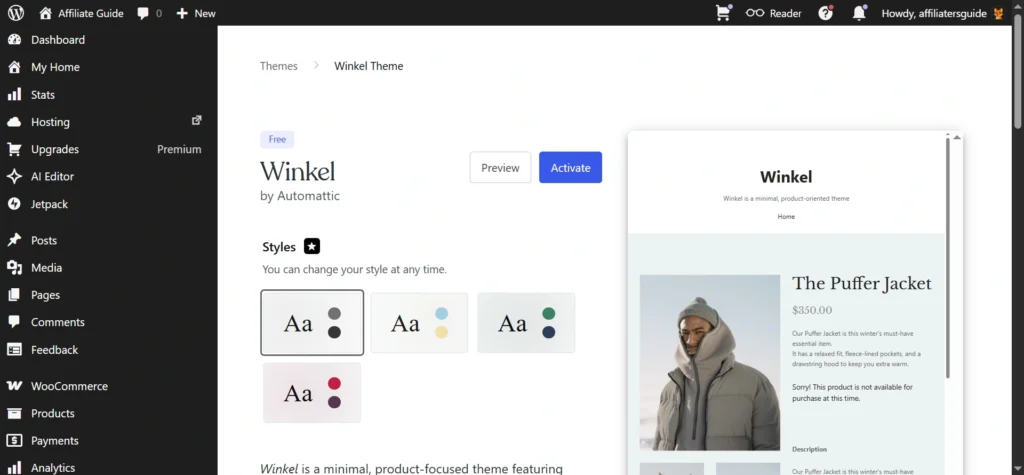
Choose a theme that works well with WooCommerce, then customize your colors, typography, spacing, and layout. If your theme supports the site editor, you can adjust global styles without writing code.
Build your homepage with a hero section, featured products, and a clear call to action. Keep the first screen focused and easy to understand so visitors know what you sell immediately.
Step 9: Add Useful Plugins
Plugins extend your store’s functionality, but start with only what you actually need. Common choices include SEO tools, email marketing tools, security tools, and subscription or booking extensions if your business model requires them.
For many stores, the essentials are enough at the start. Installing too many plugins too early can make the site harder to maintain and troubleshoot.
If you plan to sell subscriptions or appointments, use dedicated WooCommerce extensions for those features. That keeps the core store setup clean while still allowing growth later.
As your catalog grows, customers need simple navigation. Create a menu that links to your homepage, shop page, main categories, and policy pages.
You can also add filters for price, category, or product attributes. These tools make browsing easier and help shoppers find products faster.
Good navigation reduces friction and helps visitors move from browsing to buying with fewer clicks. That is especially important once you have more than a handful of products.
Step 11: Manage Orders
Once customers start buying, everything moves into WooCommerce → Orders. There you can view each order, check payment status, update fulfillment progress, and mark orders as completed.
The Customers section also helps you understand buying behavior. You can see who is purchasing, how much they have spent, and how often they return.
This information helps you make better decisions about products, promotions, and customer support. It is one of the main reasons WooCommerce is useful even for small stores.
Step 12: Test Before Launch
Before announcing the store, test every major flow. Place a test order, check the checkout experience, confirm order emails, and make sure the mobile version looks good.
Also test links, menus, product pages, and contact forms. A small issue caught early is much easier to fix than a failed checkout after launch.
If you are selling downloadable products, test the file delivery flow too. Make sure the customer gets access correctly after payment.
Step 13: Launch the Store
Once everything works, launch the store and start promoting it. Announce it on social media, email your contacts, and consider a launch offer to encourage early sales.
Connect analytics so you can track traffic, product views, and conversions. Data helps you understand what is working and what needs improvement.
Your launch is not the finish line. It is the starting point for improving the store based on real customer behavior.
👉 Check WordPress.com’s Latest Pricing
Step 14: Market It
A store needs traffic to generate sales. Search engine optimization, email marketing, and social media are the three simplest channels to start with.
SEO helps your product pages appear in search results. Email marketing helps bring shoppers back. Social media helps you reach people who do not know your brand yet.
Consistency matters more than complexity. A simple, repeatable promotion plan is usually better than trying to do everything at once.
Step 15: Improve Conversions
Once traffic starts arriving, your next goal is to turn visitors into buyers. Clear product descriptions, strong photos, trust signals, and simple checkout steps all help.
Guest checkout can reduce friction for first-time buyers. So can transparent shipping, refund, and delivery information.
Small improvements can make a noticeable difference in sales. Focus first on clarity, trust, and speed.
Step 16: Track Performance
WooCommerce Analytics gives you store-level data such as revenue, orders, and product performance. That helps you identify your best-selling items and weakest pages.
You can also use Google Analytics for deeper behavior tracking, such as where users leave the funnel. This is especially helpful if checkout performance is weaker than expected.
The point is not just to collect data. The point is to use it to make practical changes that improve sales.
Step 17: Common Issues
If plugins do not install, check whether your WordPress.com plan supports them. That is usually the first place to look.
If payments fail, review the gateway settings and test mode configuration. If order emails do not arrive, check your spam folder and email setup.
Most WooCommerce issues are straightforward once you identify the root cause. The easiest way to avoid problems is to test everything before launch.
Final Verdict
WordPress.com with WooCommerce is one of the easiest ways to start an online store today. It removes many technical barriers and lets beginners focus on products, design, and sales instead of server management.
If you want a simple launch path with less technical overhead, this approach is a strong choice. Just make sure you are on a WordPress.com plan that supports plugins before you begin.
🙏 Disclosure & Thank You
This post contains affiliate links to WordPress.com.
If you purchase through my links, I earn a small commission at no extra cost to you. Thank you for supporting us – DreamHosters
FAQs
Do I need coding skills?
No. You can build and manage a basic WooCommerce store through the dashboard without coding.
Can I use multiple payment methods?
Yes. WooCommerce supports multiple gateways and, in many setups, offline payment methods too.
Is WooCommerce free?
The plugin itself is free, but on WordPress.com you need a paid plan that supports plugin installation.
Can I sell digital products?
Yes. You can sell ebooks, downloadable files, music, software, and similar products by marking them Virtual and Downloadable.
Do I need hosting?
Not separately if you are using WordPress.com on a supported plan, because the platform handles the hosting side for you.