
Contents
How to Install WordPress on Verpex: Step-by-Step Beginner Guide (2026)
Step 1: Buy Hosting Plan
Go to the official site of Verpex Hosting and choose a plan. For beginners, Bronze shared hosting is enough.
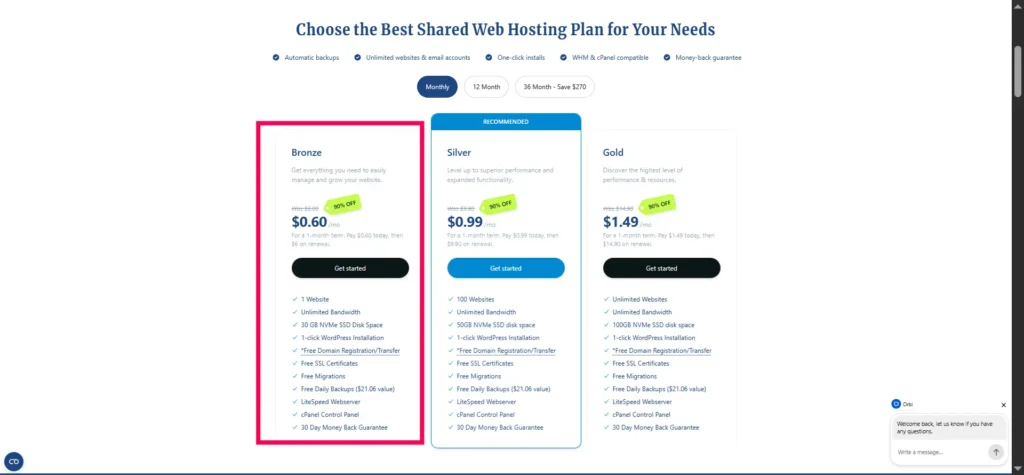
Monthly plan – $0.60 First Month. Renews at $6/mo. 30 Day Money Back Guarantee.
1 Website, 30 GB NVMe SSD Disk Space, Unlimited Bandwidth.
Select Server Location
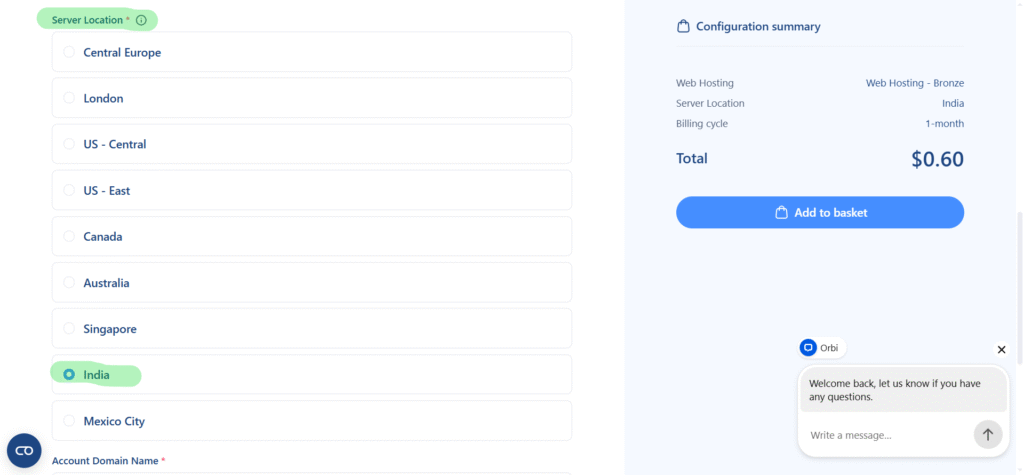
Step 2: Choose Domain
This screen is where you tell Verpex Hosting that you already own the domain, so the hosting will be connected to your own domain instead of registering a new one. Because I already have hosttests.com, the correct option is “I will use my existing domain and update my nameservers.”
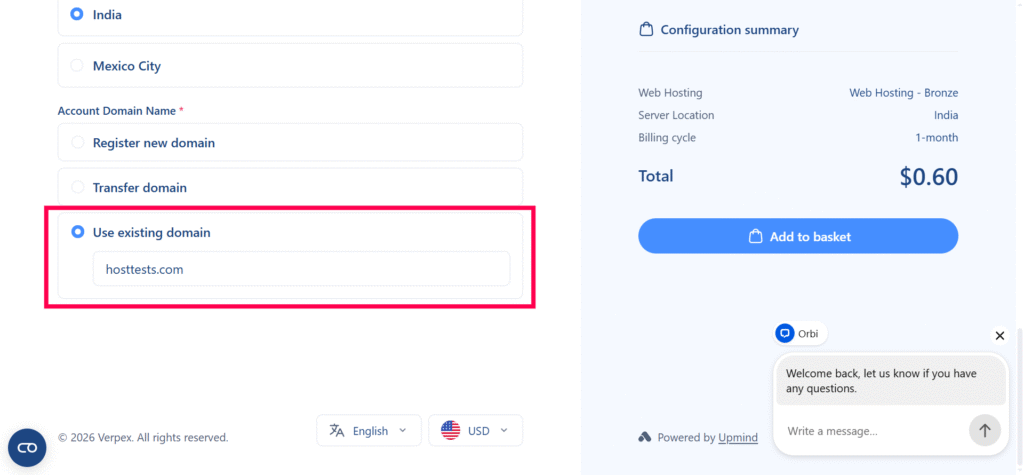
- Select the radio button for existing domain.
- Enter your domain name in the box, here hosttests.com as shown in the screenshot.
- Click Use to continue.
- Verpex will then prepare the hosting order for that domain.
Why this step matters: when you use an existing domain, you are telling the hosting company to point your domain to their server by changing nameservers later. This is the right choice if your domain is already registered somewhere else and you want to move the website hosting to AccuWeb Hosting.
Step 3: Fill Billing Details & Checkout
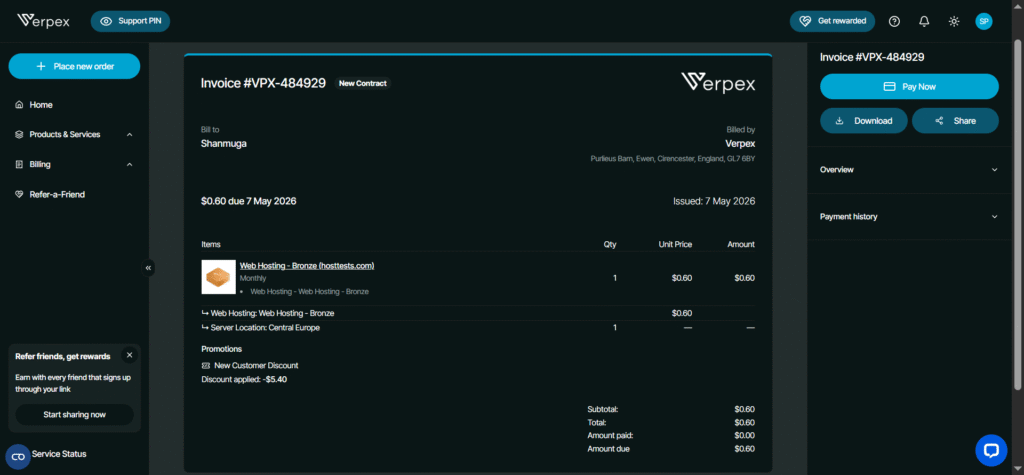
Final review screen before payment. Confirms hosttests.com on Web Hosting – Bronze, no extra storage/bandwidth, $2.95 USD total (after WPBASIC-M discount).
Key Actions:
- Account: Click “Create a New Account”—first-time user.
- Personal Info: Enter First Name, Last Name, Your Email, Phone +91 ******** (India), mandatory OTP verification.
- Billing: Company optional, Street/City/Region/India, PIN.
- Security: Strong password (use “Generate”), Security Question/Answer.
- Terms: Check “I have read and agree to Terms of Service.”
- Payment: Select PayPal (or Stripe), click Checkout—redirects to PayPal.
Order #VPX-484929 generates post-payment. Phone/Email verification follows.
Step 4: Welcome Mail: “Thank you… PRINT FOR RECORDS” from Verpex. Key info:
This email contains all the information you will need in order to get started.
Hosting account name: Web Hosting – Bronze
Domain: hosttests.com
Server Hostname: s13605.fra1.stableserver.net
Getting Started
Your hosting package is now live. You can log in through your client area under Products & Services > Web Hosting – Bronze (hosttests.com) > Login to Control Panel.
You can also log into your control panel directly at:
Hosting login page: https://s13605.fra1.stableserver.net/cpanel
cPanel username: hosttest
cPanel password: Set your cPanel password via the Verpex client area
Your domain name
If you have requested a domain name during sign up, please keep in mind that your domain name may not be visible on the internet instantly. This process is called DNS propagation and can take up to 24 hours though usually just a few minutes. Until your domain has propagated, your website and email will not function. Once is has propagated, your domain name can also be used interchangably with s13605.fra1.stableserver.net.
Pointing External Domains
If your domain name is registered elsewhere, you need to update your domain nameservers to point it to your new hosting with us. Our nameservers are:
ns1.mysecurecloudhost.com
ns2.mysecurecloudhost.com
ns3.mysecurecloudhost.com
ns4.mysecurecloudhost.com
Alternatively, you can update your A record to point to our server IP which you can find in your hosting panel under ‘Shared service IP’.
Once your domain has propagated, you may also use https://www.hosttests.com/cpanel/
Support Tip: Chat “Verpex Sales” (reply in seconds), transcript will be emailed.
Step 5: Access Client Dashboard & Product Details
Post-verification, login to Verpex.com (email/password from checkout) leads to Clients Dashboard showing 1 Service (your hosting), 0 domains/invoices/tickets.
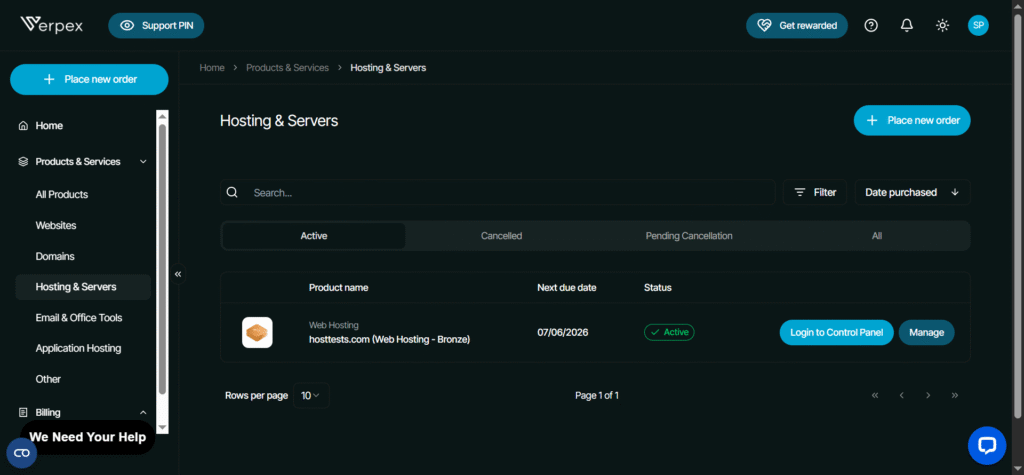
Client Area Flow:
- Click All products -> View product.
- Product Details: Confirms hosttests.com (Web Hosting – Bronze), Status: Active (green), 0% disk/bandwidth usage, hosttests.com.
Step 6: cPanel Login: Click “Log into Control Panel”—opens full dashboard with Tools (SiteJet AI builder, WordPress by Softaculous, Email). Current user: hosttest, primary domain hosttests.com.
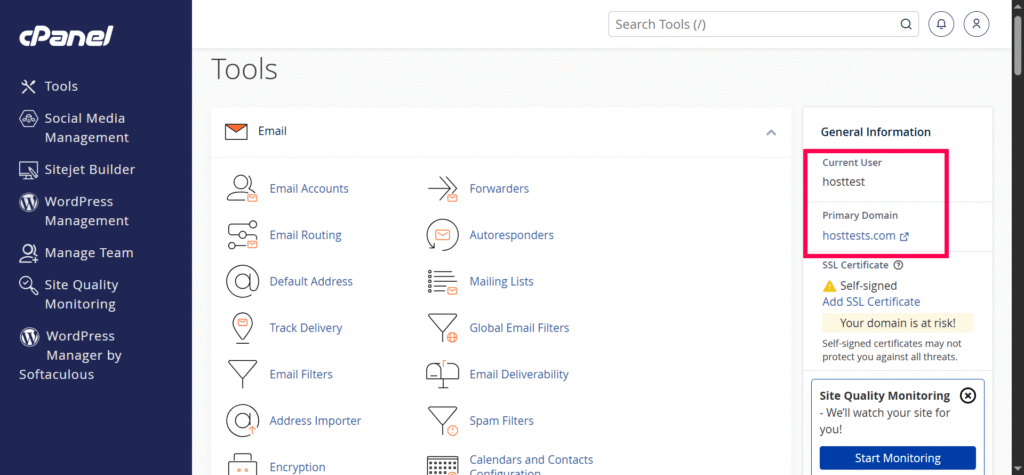
Your WP is pre-installed via Softaculous. Ready for cPanel steps!
Step 7: Access WordPress Management (WP Toolkit) in cPanel
In cPanel dashboard, find WordPress Management icon (left sidebar, under Tools). Click it to open WP Toolkit—cPanel’s built-in WordPress control panel.
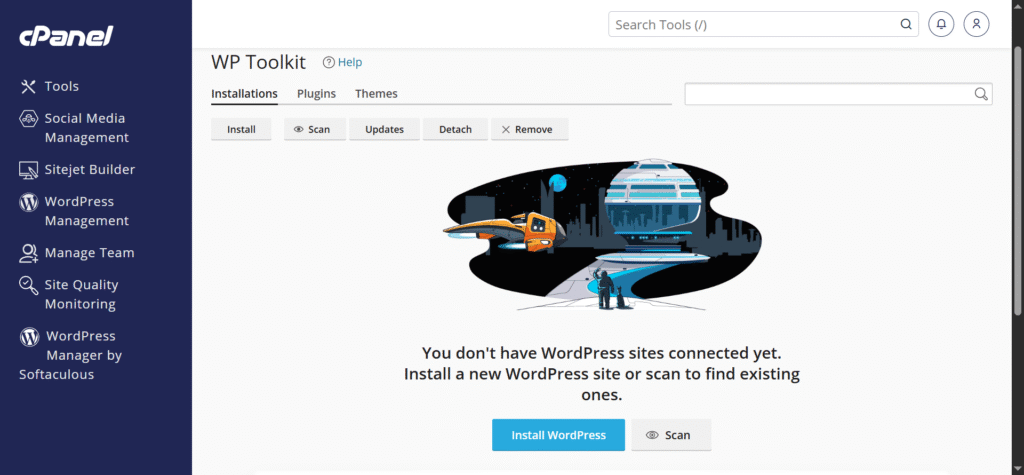
- Shows 1 WordPress site installed: hosttests.com (auto by Softaculous).
- Top tabs: Install, Scan, Updates, Debug, Remove.
- Management Section: Dashboard, Plugins (6.4 up-to-date), Themes, Database, Backup/Restore, Logs, WP-CLI.
- Status: WP 6.9.4 up-to-date, self-signed SSL warning (fix with AutoSSL), critical security notices.
Click “Install”: Leads to installation screen (next step). Since yours is pre-installed, use for edits/backups.
Great for beginners—no manual file uploads needed
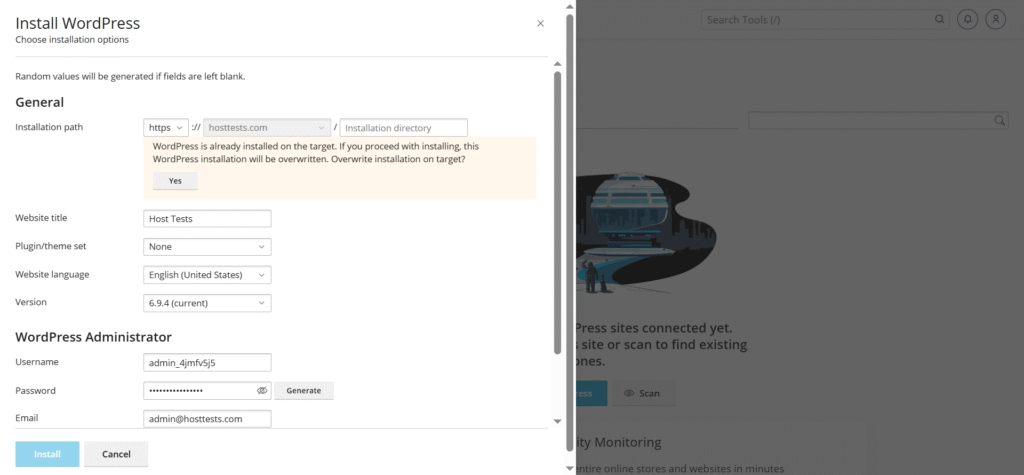
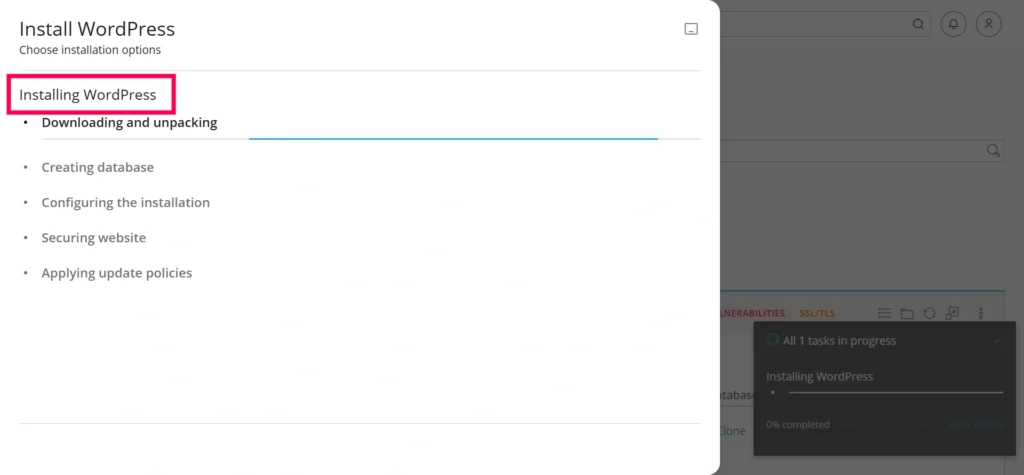
Installing Progress: Progress bar shows “Downloading/unpacking,” “Creating database,” “Configuring,” “Securing,” “Update policies.” “All 1 tasks in progress” (0% to complete).
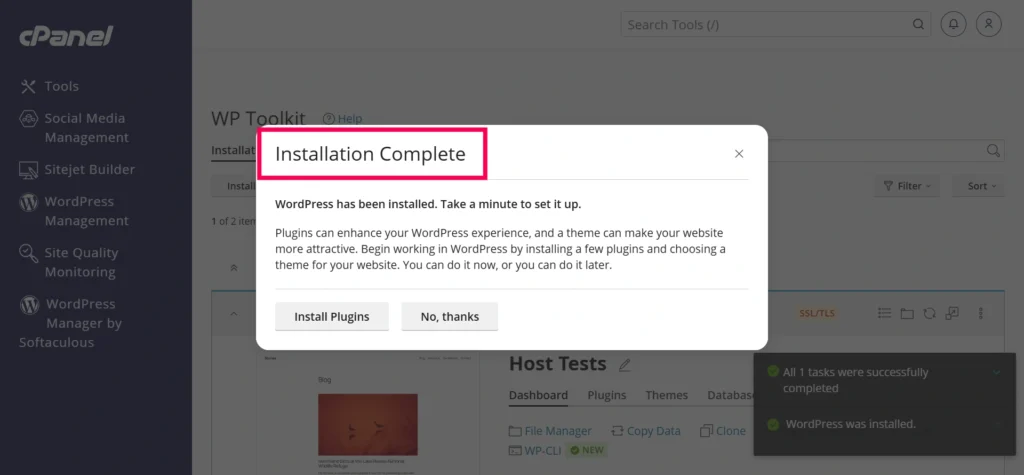
Installation Complete: Success popup “WP Installation Complete” for Host Tests site. Offers “Install Plugins” (enhance with themes/plugins) or “No, thanks” to skip. “All tasks successfully completed”.
Your auto-install matches this (WP 6.9.4). Now access https://hosttests.com/wp-admin (admin login from Softaculous email).
Super quick—under 2 minutes.
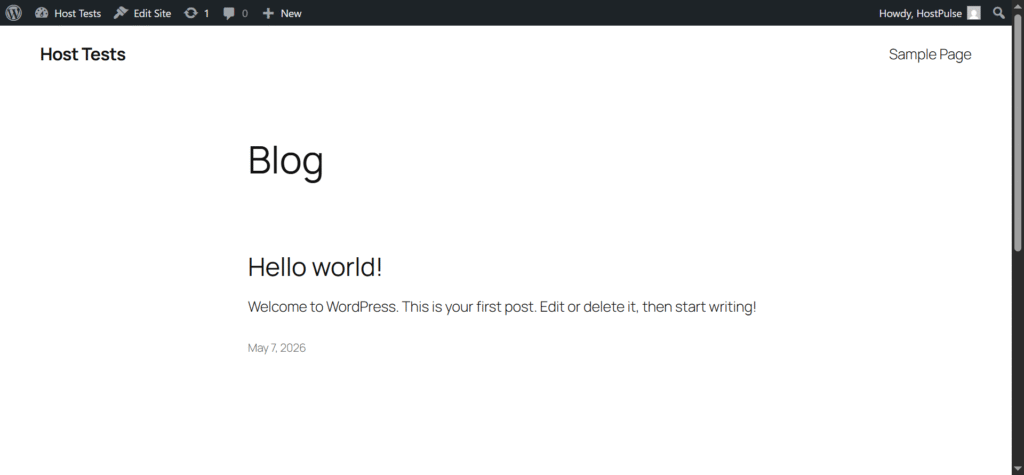
Step 8: Live WordPress Site – Success!
Your home page screenshot confirms WordPress installation complete and fully functional on hosttests.com. Clean “Host Tests” theme with welcome text, sample page, search bar—ready for your Website content.
Quick Tips Post-Install:
- WP Admin: https://hosttests.com/wp-admin
- Backup first via Toolkit.
- SSL: cPanel > SSL/TLS > AutoSSL.
Congrats—your guide site foundation is set !
Scanner Layer
- Setup time: 15 to 20 minutes
- Skill level: Beginner
- Platform: Verpex Hosting
- Method: One-click WordPress installer
- Extra time: DNS may take up to 24 to 48 hours
Performance and Speed
Speed matters for SEO and user experience. Verpex Hosting offers:
- Unlimited Bandwidth
- 30 GB NVMe SSD Disk Space
- 1-click WordPress Installation
- Free SSL Certificates
- Free Migrations
- Free Daily Backups ($21.06 value)
- LiteSpeed Webserver
- cPanel Control Panel
- 30 Day Money Back Guarantee
For small to medium websites, performance is stable. If you plan heavy traffic, consider upgrading to VPS or cloud hosting.
Ease of Use
The setup process is beginner-friendly. You do not need technical knowledge. The interface is simple: Clear dashboard, Easy navigation , and One-click installs. Even if it is your first website, you will manage it easily.
Customer Support
Support is important when you face issues. Verpex Hosting provides: Live chat, Email support, and Knowledge base. Response time is usually quick. They also help with WordPress-related problems.
Pricing
Pricing is affordable compared to many providers. You can start with shared hosting and upgrade later.
Pros and Cons
Pros
- Easy WordPress installation
- Affordable pricing
- Good support
- Flexible hosting plans
Cons
- Interface may feel basic
- Advanced features limited on lower plans
Who Should Use This Hosting
This hosting is suitable for:
- Beginners
- Bloggers
- Students
- Small businesses
When This Hosting Is a Good Choice
Choose Verpex Hosting if:
- You are starting your first website
- You want low-cost hosting
- You need simple setup
When You May Want Another Hosting
Consider alternatives if:
- You expect high traffic
- You need premium speed
- You want advanced features
Final Recommendation
If your goal is to launch a WordPress site quickly without complications, Verpex Hosting is a practical option. It keeps things simple and affordable. You can always upgrade later as your site grows.
Free SSL • Daily Backups • LiteSpeed Servers • WordPress Ready
🙏 Disclosure & Thank You
This post contains affiliate links to WordPress.com.
If you purchase through my links, I earn a small commission at no extra cost to you. Thank you for supporting us – DreamHosters